My simple yet lovely Valentine’s Day Sugar Cookies are soft melt-in-your-mouth delicious with just the right amount of sweetness. My sugar cookie dough has rich cream cheese and lemon zest which add a subtle tang and citrus kick enhancing the natural sweetness you expect in sugar cookies. Heart-shaped cookie cutters and red and pink royal icing make these cookies perfect for Valentine’s Day. This recipe is perfect for any level baker.

Jump to:
- Why You’ll Love These Sugar Cookies
- What is the Flood Royal Icing Technique?
- Key Ingredients for Valentine’s Day Sugar Cookies
- How to Make Cream Cheese Sugar Cookies
- How to Make the Royal Icing
- How to Decorate the Cookies
- How to Store These Sugar Cookies
- More Wonderful Cookie Recipes
- Tips for Ensuring a Delicious and Beautiful Cookie
- Valentine's Day Sugar Cookies with Royal Icing
Why You’ll Love These Sugar Cookies
- Simple, tasty sugar cookie: My sugar cookie dough is zero fuss and produces a soft, no-spread cookie. The creamy, sweet flavor is complemented by lemon zest and pure vanilla extract.
- Flawless royal icing: Royal icing is great because it’s sturdy, adds just the right amount of sweetness, and works well whether you want to keep your decorations simple or elaborate. It also dries non-sticky with a matte finish that makes it easy to create smudge-free decorated sugar cookies so you can get as intricate as you want.
- Perfect for gifting: These iced sugar cookies are so pretty and would make the best Valentine’s gift for someone special. Because the royal icing hardens completely, you can easily stack your cookies in a gift box and mail them without any worries.
What is the Flood Royal Icing Technique?
For royal icing, you typically start with a border first. This thicker icing creates a clean, sturdy edge that keeps the frosting from spilling over the sides of the cookie. Once the border is in place, it’s time for what we call flood icing. You thin out the border icing by adding water and using it to “flood” the center of the cookie, spreading the runnier icing to cover the surface.
If you prefer you can decorate the cookies with my vanilla buttercream recipe. You can also use my classic shortbread cookie recipe if you prefer an egg-free Valentine's day cookies.
Key Ingredients for Valentine’s Day Sugar Cookies

- Unbleached All-Purpose Flour: all-purpose flour gives the sugar cookies their structure. For the smoothest dough, I recommend sifting the flour before adding it to the other ingredients.
- Baking Powder: This is a leavening agent, and it helps the sugar cookies rise and achieve a light, soft texture.
- Large Egg: The egg binds the sugar cookie dough together.
- Pure Vanilla Extract: Creamy, sweet vanilla extract works well with bright lemon zest, sugar, and cream cheese to enhance all the flavors.
- Granulated Sugar: You can’t have sugar cookies without sugar! This adds sweetness and moisture.
- Lemon Zest: You’ll need the zest from one medium-sized lemon. The zest helps inject a bite of citrus flavor into the cookies to balance out the creaminess from the cream cheese.
- Unsalted Butter: Butter is important for richness, moisture, and a tender crumb in these cookies. Make sure to use room-temperature butter when mixing the dough, because cold butter won’t mix properly with the rest of the ingredients.
- Full-Fat Cream Cheese: This gives the sugar cookies a unique tang and richness, but you won’t get it if you use half-fat or low-fat cream cheese. Full-fat Philadelphia cream cheese is my go-to brand because of its tanginess and moisture level.
Full ingredients, measurements, and instructions are in the recipe card at the bottom of this post.
How to Make Cream Cheese Sugar Cookies
This easy sugar cookie dough can be made in a food processor or a stand mixer. The recipe card below contains instructions for both methods, but I prefer the food processor because it’s faster.
Step 1: Place the flour, baking powder, and salt in a large bowl and whisk together.
Step 2: Crack the egg into a small bowl and add the vanilla extract. Whisk the egg and vanilla extract together.

Step 3: Place the sugar in the bowl of a food processor and zest the lemon directly on top of the sugar. Process the sugar-lemon mixture until combined.

Step 4: Add the butter and cream cheese to the food processor.

Step 5: Process the ingredients together until well combined and the dough appears creamy.

Step 6: With the food processor running, slowly pour the beaten egg into the food processor through the feeding tube.

Step 7: Add the dry ingredients all at once.

Step 8: Process the dough until it starts to form a ball.
NOTE: The dough ball will be a little sticky, so generously flour a work surface and your hands.

Step 9: Flour your hands and work surface generously as the dough will be sticky. Divide the into two equal pieces. Wrap each piece of dough in plastic and refrigerate for 2 hours.

Step 10: Flour your work surface and roll the dough to ¼-inch thickness. Cut out cookies, reroll scraps, and repeat.

Step 11: Arrange cookies 2 inches apart on the lined baking sheet. Bake for 10-14 minutes.

Step 12: Bake for 10-14 minutes until the edges are light golden brown.
Bake 13: Let cookies cool on the sheet for 5 minutes, then transfer to a wire rack to cool completely.

How to Make the Royal Icing
Royal icing is easy to make and a fun way to decorate the sugar cookies. Let's start with the key ingredients.

- Meringue Powder: Meringue powder is used instead of egg whites for ease and food safety. It creates the stiff peaks required for royal icing and dries faster than using raw egg whites.
- Powdered Sugar: Sifted powdered sugar provides the bulk of the icing and that sweet bite.
- Lemon Juice: A little bit of lemon juice helps the peaks of the icing stabilize to give you a sturdy icing.
- Water: Water is mixed with the meringue powder and required to thin out the icing as needed depending on what type of decorating you're doing and give it a more easily spreadable texture.
Step 1: In a large bowl, beat the meringue powder and water until soft peaks form.
Step 2: Add powdered sugar 1 cup at a time, mixing and scraping the bowl between each addition.

Step 1: Combine meringue powder and water in a large bowl

Step 2: Beat the meringue and the water until soft peaks form.
Step 3: Add the lemon juice and beat until stiff peaks form and the icing loses its shine. Use the icing right away or store it in an airtight container at room temperature for up to 1 week.

Step 3: Beat in the powdered 1 cup at a time.

Step 4: Add the lemon juice and beat the icing until stiff peaks form.
Step 5: Divide this stiff icing equally into multiple bowls. Color one with 4-5 drops of red gel food coloring and the other with 2-4 drops of pink.

How to Decorate the Cookies
Step 6: Transfer a little of each color to piping bags fitted with small round tips (Wilton #2 or #3).
Step 7: Pipe red borders on the cookies needing red outlines, then pipe pink borders on the others. Let the icing dry for 15–20 minutes.

Step 8: Add a little water to the original icing bowls until is thinner and
Step 9: Fill the center with the flood icing, using a toothpick or skewer to spread it evenly and pop any bubbles. Place the cookies on a rack or tray and let the icing dry.
Step 10: Let cookies dry for 30 minutes before serving, 3 hours before adding more decoration, or 6-8 hours (or overnight) for transport or shipping.
How to Store These Sugar Cookies
The plain, undecorated cookies can be stored in an airtight container for up to 7 days. When ready to eat them, make the royal icing fresh and ice them the day you need them.
More Wonderful Cookie Recipes
Want more cookie ideas? Fortunately for you, I've got plenty!
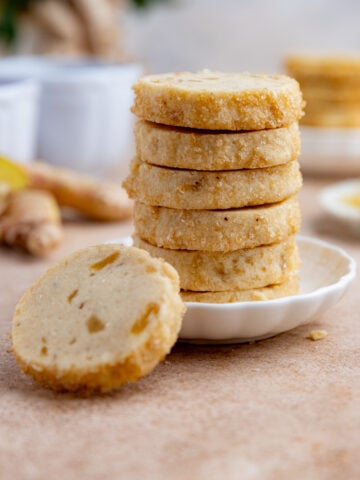
- Brown Sugar Shortbread Cookie
- Soft Vanilla Shortbread Cookies
- Classic Shortbread Cookies
- Espresso Chocolate Pinwheel Cookies
Tips for Ensuring a Delicious and Beautiful Cookie
- Use room temperature butter and cream cheese for the sugar cookie. Cold ingredients won’t creamy together properly.
- Don’t skip the lemon zest. It adds a subtle tartness that balances the sweetness of the cookies.
- For best results use a kitchen scale to measure the flour. If there is too much flour the cookies will be dry. Too little and the cookies won’t hold their shape in the oven.
- If the dough becomes too soft while working with it, put it back in the refrigerator for 10-15 minutes.
- Humidity can affect royal icing consistency. You may need slightly less or more water depending humid or dry it is, but add a little at a time so the icing isn’t too thin.

If you make these oh so pretty sugar cookies please leave a rating and a comment below.
Connect with me on Instagram and tag me @bakesbybrownsugar to share your recipe remake photos.
Like what you see? Click here to subscribe to Bake's by Brown Sugar Baking Newsletter to get free and delicious treats delivered to your inbox.
Want to Save This Recipe?
Enter your email below and I'll send it to your inbox. Plus get new and recommended recipes sent to you every week!
By submitting this form, you consent to receive emails from Bakes by Brown Sugar.

Valentine's Day Sugar Cookies with Royal Icing
Ingredients
Cream Cheese Sugar Cookies
- 3 cups (375 grams) unbleached all-purpose flour
- 1-1/2 teaspoons (6 grams) baking powder
- 1/2 teaspoon kosher salt
- 1 large (50 grams) egg
- 1 teaspoon pure vanilla extract
- 1 cup (200 grams) granulated sugar
- 1/2 teaspoon lemon zest the zest from one medium sized lemon
- 1 cup (227 grams) unsalted butter room temperature
- 3 ounces (85 grams) full-fat cream cheese
Royal Icing
- 3 tablespoons meringue powder
- 1/2 cup (120 ml) water
- 4 cups (480 grams) powdered sugar sifted
- 1/2 teaspoon lemon juice
- Red and Pink gel food coloring (optional)
Instructions
- This cookie makes 32, 2-inch heart shaped cookies.
Making the Cookie Dough
- The cookie dough can be made in the food processor or a stand mixer.
For Both Methods
- Place the flour, baking powder, and salt in a large bowl and whisk the ingredients together. Crack the egg into a small bowl and add the vanilla extract. Whisk the egg and vanilla extract together.
Food Processor
- Place the flour, baking powder, and salt in a large bowl and whisk the ingredients together. Crack the egg into a small bowl and add the vanilla extract. Whisk the egg and vanilla extract together.
- Place the sugar in the bowl of a food processor. Zest the lemon directly into the bowl on top of the sugar. Process the sugar-lemon mixture for about 30 seconds.
- Add the butter, and the cream cheese to the food processor. Process the ingredients together until the ingredients are well combined and the dough appears creamy.
- With the food processor running, slowly pour the beat egg into the food processor through the feeding tube. Once the mixture is well combined, scrape the sides of the food processor bowl and make sure all the ingredients are well combined.
- Add the dry ingredients all at once. Process the dough until it starts to form a ball of dough.
Stand Mixer
- Place the sugar in the bowl of a stand mixer. Zest the lemon on top of the sugar. Use your fingers to rub the lemon zest into the sugar.
- Add the butter, and the cream cheese to the butter. With the paddle attachment, mix the ingredients on medium speed until the ingredients come together are well combined and the dough appears creamy.
- Add the egg mixture and mix on medium speed until the egg is fully incorporated. Scrape the sides and bottoms of the bowl.
- Add the dry ingredients all at once. Mix the dough on low speed until the flour is incorporated. Increase the speed to medium and mix until the dough comes together into large clumps.
- For Both Methods
- The dough will be a little sticky. Generously flour a work surface and your hands. Place the dough on the work surface, and divide the dough into 2 even pieces. Shape each piece of dough into a 1/2-inch rectangle.
- Wrap each piece of dough in plastic wrap. Refrigerate the dough for 2 hours.
- At this point, the cookie dough can be frozen for up to 1 month. Place both pieces of dough (after the initial refrigeration) in a large freezer-safe bag. Freeze the cookie dough for up to 1 month.
Bake the Cookies
- Preheat the oven to 350°F (180°C). Line a half-baking sheet with parchment paper or Silpat.
- Remove the cookie dough from the refrigerator and let it sit at room temperature for 15 minutes.
- Flour your work surface. Roll out the dough to 1/4-inch thickness. Cut out the cookie shapes. Reroll the dough scrapes to 1/4-inch thickness and cut out additional cookies.
- Place the cookies about 2 inches apart on a baking sheet lined with parchment paper.
- Bake the cookies for 12-14 minutes until the bottom edges are lightly golden brown. If you want your cookies a little on the pale side, aim for about 10-12 minutes.
- Remove the baking sheet from the oven. Cool the cookies on the baking sheet for 5 minutes, then move them to a wire rack to finish cooling.
How to Store the Cookies
- The unfrosted (undecorated) cookies can be stored in an airtight container for up to 7 days.
Make the Royal Icing
- Place the meringue powder and the water in a large mixing bowl. Beat the mixture with a handheld mixer on high speed until soft peaks form.
- Add the powdered sugar 1 cup at a time, mixing each addition on medium-low speed. Scrape down the bowl thoroughly between each addition.
- Once all the powdered sugar is mixed in add the lemon juice and beat on high speed until stiff peaks form.
- Immediately use the icing, or place the icing in an airtight container. The royal icing will last up to 1 week at room temperature.
Decorate the Cookies
- Divide stiff icing into two equal portions in separate bowls. Color the first bowl with 3-4 drops of red gel food coloring. Color the second bowl with 2-3 drops of pink gel food coloring.
- Place a portion of each color in piping bags fitted with small round tips (Wilton #2 or #3).
- Pipe borders on all cookies requiring red outlines. Then pipe borders on all cookies requiring pink outlines. Let the borders dry for 15-20 minutes.
Make the Flood Icing
- Working with your original colored bowls, gradually add water 1/8 teaspoon at a time to each bowl. You probably won’t need more than 1/8 or 1/4 teaspoon of water depending on how much icing you have left. Test the consistency by drizzling icing back - it should disappear in 8-10 seconds.
- Transfer the icing to piping bags with the tips inserted (Wilton #3 or #4 tips) or squeeze bottles.
- Fill red-bordered cookies with the red flood icing. Use a toothpick or a wooden skewer to spread the icing to the border or into the corners and to pop any bubbles. Set the decorated cookies on a sheet tray or a large cookie rack. Repeat the steps for the pink bordered cookies.
- Let the cookies dry 30 minutes before serving. If you are adding additional decoration on top of the flood icing, let them dry for 3 hours. If you are planning to ship them or transport them let them dry for 6-8 hours or overnight.
Notes
-
- Use room temperature butter and cream cheese for the sugar cookie. Cold ingredients won’t creamy together properly.
-
- Don’t skip the lemon zest. It adds a subtle tartness that balances the sweetness of the cookies.
-
- For best results use a kitchen scale to measure the flour. If there is too much flour the cookies will be dry. Too little and the cookies won’t hold their shape in the oven.
-
- If the dough becomes too soft while working with it, put it back in the refrigerator for 10-15 minutes.
-
- Humidity can affect royal icing consistency. You may need slightly less or more water depending on the environment, but add a little at a time so the icing isn’t too thin.
-
- The 8-10 second rule for flood icing is key - if the drizzled icing disappears too quickly, the icing is too thin; if it takes longer, it's too thick.


Thanks for visiting my blog. Let me know what you think.