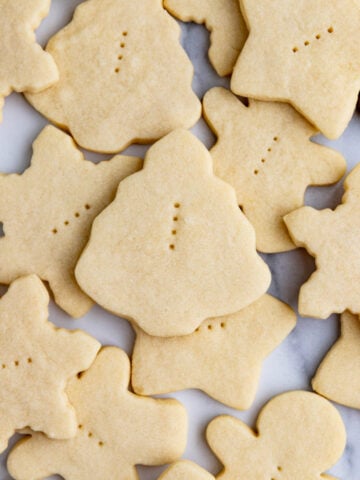
Your holiday baking won’t be complete without these easy-to-make espresso chocolate pinwheel cookies! Each swirled cookie has an amazing flavor combination of sweet vanilla and rich chocolate espresso dough. Those flavors are paired with a best-of-both-worlds texture that matches crispy edges with a soft center–exactly what you want when you bite into a fresh cookie! With their festive swirl pattern, these are the perfect holiday cookies to serve at parties or to send as a gift to friends and family.

Reasons to Bake These Pinwheel Cookies
These buttery and tender holiday cookies bring together two complementary cookie doughs, one vanilla, and one espresso chocolate. Each dough is simple to make, and the cookies are baked using a classic slice-and-bake method that works reliably every time. Although the swirl pattern step can be a little tricky at first, my easy-to-follow recipe steps will help you get to swirled success in no time.
Vanilla and chocolate pinwheel cookies bring an indulgent mix of vanilla, espresso, and chocolate into one magical cookie that’s both sweet and decadent. When you bite into these cookies, the chocolate espresso flavor does stand out as the dominant note, but the cocoa and subtle hint of vanilla still come through, balancing everything beautifully.
For more delightful Christmas cookie recipes, my Pistachio Shortbread Cookies or Cranberry Orange Cookies are just the ticket. You’ll also love my Peppermint Snowball Cookies.
Chocolate Pinwheel Cookie Ingredients
Here are the key ingredients you’ll need to make this delightful holiday cookie:

- Instant Espresso: The espresso adds a subtle coffee flavor while also enhancing the rich chocolate flavor of the unsweetened chocolate. You can make the cookie without the espresso if you prefere.
- Unsweetened Chocolate: Adds a delicious chocolate flavor and melted chocolate ensures the dough stays soft and easy to work with.
Full ingredients, measurements, and instructions are in the recipe card at the bottom of this post.
Make the Pinwheel Cookie Dough
Step 1: Sift the all-purpose flour into a large bowl, then whisk in the baking powder and salt.

Step 2: Combine the butter and sugar in a stand mixer bowl. Mix on medium-low until creamy, about 1 minute, then scrape the bowl.

Step 3: Add the egg and vanilla extract and beat on medium speed until the egg is fully incorporated.
Step 4: Add the egg and vanilla extract and beat on medium speed until the egg is fully incorporated.

Step 5: Add all the dry ingredients to the batter and mix on low speed until the ingredients are thoroughly combined and the dough starts to form a ball.

Step 6: Divide the dough in half. Add the melted chocolate to the mix on medium speed until the chocolate is fully incorporated.

Step 7: Shape the two pieces of dough into rectangles or squares.
Step 8: Tear off four 14-inch pieces of wax paper. Place the vanilla dough on a sheet and shape it into a square. Cover the dough with another wax sheet, then roll it out to 1/8-inch thick, forming a 9x9-inch square. Trim the edges and use the excess to square off the corners.

Step 9: Place the vanilla dough on a sheet and shape it into a square. Cover the dough with another wax sheet, then roll it out to 1/8-inch thick, forming a 9x9-inch square.

Step 10: Set the first piece of vanilla dough aside and repeat these steps with the espresso chocolate dough.
Step 11: Stack the two pieces of dough (each still sandwiched between the two pieces of wax paper) on top of a board or baking sheet and refrigerate for 20 minutes. The dough is sticky, so it will only be chilled long enough to make it easier to handle and roll.
How To Roll the Pinwheel Dough
Step 12: Remove both the vanilla and chocolate dough from the refrigerator.

Step 13: Peel one side of wax paper off the vanilla dough, then press it back on lightly. Flip the dough over and remove the top piece of wax paper.

Step 14: Use the wax paper to help place the chocolate dough on top of the vanilla dough, lining up the edges as closely as possible.

Step 15: Use the wax paper under the vanilla dough to help roll the dough into a tight cylinder. This will create the pinwheel pattern. Trim the ends so the cylinder has nice, straight ends.

Step 16: Wrap the swirled dough in the wax paper and twist the ends to close the wax paper.
Step 17: Chill the dough again for 60-90 minutes.
Slice and Bake the Pinwheel Cookies

Step 18: Unwrap the dough and place it on a cutting board. Cut the dough into even 1/4-inch slices.
Step 21: Place the cookie slices an inch apart on the baking sheet. Bake until the bottom edges of the cookies just turn a light brown. While the first set of cookies is baking, return the other sliced cookies to the refrigerator.

Step 19: Place the cookie slices on a prepared baking sheet

Step 20: Bake until the bottom edges of the cookies just turn a light brown.
Step 21: Take the cookies out of the oven, let them rest on the baking sheet for a few minutes, then transfer them to a wire rack with a spatula to cool.
How to Store the Baked Cookies
You can store the cookies in an airtight container for up to 10 days. They’re a fantastic cookie to make in advance if you have a cookie swap or event coming up. Just know that the texture does change slightly over a few days, losing the crispiness and becoming more soft throughout.

How to Store the Cookies
You can store the cookies in an airtight container for up to 10 days. They’re a fantastic cookie to make in advance if you have a cookie swap or event coming up. Just know that the texture does change slightly over a few days, losing the crispiness and becoming more soft throughout.

Troubleshooting Pinwheel Cookies
- There are gaps between the vanilla and chocolate dough. After stacking the doughs lightly press the two doughs together to remove any air bubbles. Also when rolling the doughs together, go slow making sure the leading edge is tucked under.
- The dough is sticking to the wax paper. If the dough is sticking to the wax paper, return it to the refrigerator and chill for another 10 minutes.
- The doughs aren’t evenly lined up. This is okay. Take a sharp knife or pizza wheel and line up the edges.
- Cookies are dry cookies: Overbaking can lead to dry cookies. Keep a close eye on them and bake just until the edges are set.
More Holiday Cookie Inspiration
Hosting a cookie swap? Need a fun cookie to bring to a holiday gathering? I’ve got all the recipes you need!
- Pistachio Shortbread Cookies
- Cranberry Orange Cookies
- Peppermint Snowball Cookies
- Chocolate Thumbprint Cookies

If you make this yummy espresso flavored cookies please leave a rating and a comment below.
Connect with me on Instagram and tag me @bakesbybrownsugar to share your recipe remake photos.
Like what you see? Click here to subscribe to Bake's by Brown Sugar Baking Newsletter to get free and delicious treats delivered to your inbox.
Want to Save This Recipe?
Enter your email below and I'll send it to your inbox. Plus get new and recommended recipes sent to you every week!
By submitting this form, you consent to receive emails from Bakes by Brown Sugar.

Espresso Chocolate Pinwheel Cookies
Ingredients
- 1-3/4 cups (220 grams) unbleached all-purpose flour
- 1/2 teaspoon baking powder
- 1/2 teaspoon kosher salt
- 1 ounce (28 grams) unsweetened chocolate
- 8 tablespoons (113 grams) unsalted butter room temperature
- 3/4 cup (150 grams) granulated sugar
- 1/2 teaspoon pure vanilla extract
- 1 large (50 grams) egg
- 1 teaspoon instant espresso (optional)
Instructions
Make the Cookie Dough
- Weigh the all-purpose flour and sift it into a large bowl. Add the baking powder and the salt and whisk the ingredients together.
- Chop the chocolate into small uniform pieces and place it in a small microwave safe bowl. Microwave the chocolate in two 30 second bursts stirring the chocolate after each 30 seconds. Then microwave in 15 second bursts stirring after each 15 second interval. When there a couple of pieces left stir the chocolate until it is all melted. Set aside to cool.
- Place the butter and sugar in the bowl of a stand mixer. Mix on medium low speed until the ingredients are combined and the butter and sugar look creamy, about 1 minute Scrape the bottom of the bowl. Add the egg and vanilla extract and beat on medium speed until the egg is fully incorporated.
- Add all the dry ingredients to the batter and mix on low speed until the ingredients are thoroughly combined and the dough starts to form a ball. The dough will weigh 530 grams.
- Weigh out 280 grams of the dough and put into a small bowl. This dough is your vanilla dough.
- Add the espresso and melted chocolate to the dough in the mixer and beat on medium speed until the chocolate is fully incorporated.
- Tear off four pieces of wax paper, each about 14 inches long. On one piece, place one of the doughs and shape it into a square. Cover it with another piece of wax paper. With a rolling pin, roll over the paper to roll the dough out to 1/8-inch thickness. It should be about 9 by 9-1/2-inch square. Trim any pieces of dough that exceed the 9-inches to square the dough and add the excess dough to the corners so it the dough is square. Set the first piece of dough aside and repeat these steps with the second piece of dough.
- Stack the two pieces of dough (each still sandwiched between the two pieces of wax paper) on top of a board or baking sheet and refrigerate the dough for 20 minutes. The dough is sticky, so it’s only chilled long enough so it’s easier to handle and roll together.
Shape the Cookie Dough
- Remove the dough from the refrigerator. Lay the vanilla dough a on work surface. Peel one side of the wax paper off the dough then put it back on. Turn the dough over and then peel off the top piece of wax paper only. Repeat these steps with the chocolate dough – peel off one side of the wax paper, then put it back on. Turn it over and peel off the other piece of wax paper. Use the wax paper to help lay the chocolate dough on top of the vanilla dough. Line the edges up as much as possible.
- Use the wax paper under the vanilla dough to help roll the doughs into a cylinder. Trim the ends so the cylinder has straight ends. Wrap the dough in the wax paper and twist the ends to close the wax paper.
- Chill the dough for 60-90 minutes.
Bake the Cookies
- Right before the dough is removed from the refrigerator, preheat the oven to 350°F. Line one or two half baking sheets with parchment paper.
- Unwrap the dough and place it on a cutting board. Cut the dough into 1/4-inch slices. Place the slices 1 inch apart on the baking sheet. Bake for 10-12 minutes until the bottom edges of the cookies barely turn a light brown. While the first set of cookies is baking return the other sliced cookies to the refrigerator.
- Remove the cookies from the oven, let them sit on the cookie sheet for about 2 minutes then use a spatula to move the cookies to a wire cooling rack.
- If using only one baking sheet, let it cool completely before baking the next batch of cookies. If using two baking sheets put cookies on the second baking sheet and repeat the baking instructions.
Store the Cookies
- Store the cookies in an airtight container for up to 10 days.
Notes
- There are gaps between the vanilla and chocolate dough. After stacking the doughs lightly press the two doughs together to remove any air bubbles. Also when rolling the doughs together, go slow making sure the leading edge is tucked under.
- The dough is sticking to the wax paper. If the dough is sticking to the wax paper, return it to the refrigerator and chill for another 10 minutes.
- The doughs aren’t evenly lined up. This is okay. Take a sharp knife or pizza wheel and line up the edges.
- Cookies are dry cookies: Overbaking can lead to dry cookies. Keep a close eye on them and bake just until the edges are set.


Lori says
i just made these for a cookie exchange at work. They look great, but I have one question, when do you add the espresso?
Cheryl Norris says
Hi Lori
I'm so sorry about that typo. The espresso is added to the chocolate dough the same time as the melted chocolate. I have corrected the recipe. Thanks for asking this question.
Lori says
Thanks for the response. They were a big hit!!!
Cheryl Norris says
Hi Lori
You're welcome and I'm glad the cookies were a big hit.
Sandra Waide says
I didn't see Lori's question and your response before making the cookies today. I had already measured and separated the doughs, so opted to put the vanilla dough back into the mixing bowl and added the espresso powder, mixing well. I figured the taste would be in the cookie, although the dough was darkened a little from the espresso powder. I'm glad the recipe was corrected and I've now saved the revised copy. Thank you for sharing your recipe.