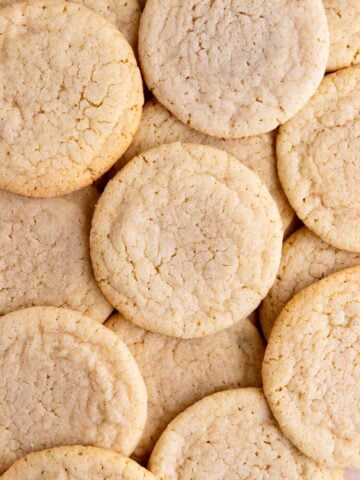
This cutout shortbread cookie recipe is buttery, crisp, and not overly sweet, making it the perfect match for a glossy vanilla icing. Based on my classic shortbread cookies, it comes together with a few pantry staples, chills quickly, and holds its shape beautifully. Your favorite Christmas cookie cutter designs will bake up clean and sharp, giving you festive cookies that look as good as they taste.
Why I Love Making These Cookies
This Christmas cookie recipe combines my love of shortbread with wanting a less sweet sugar cookie. Since shortbread cookies already have that tender, buttery, melt-in-your-mouth bite that I love so much, they make the perfect base for a holiday cookie that’s just as decorative but easier to pull off.
This recipe is adapted from my easy shortbread cookie recipe, and uses the same basic method: mix, roll, chill, and bake. To keep the recipe simple I chose a quick and easy icing. It takes longer to dry than royal icing, but still has that glossy finish.
My cream cheese Christmas sugar cookies with a slight tang from the cream cheese, are another great cutout Christmas cookie to try and decorate.
Shortbread Christmas Cookie Ingredients
Shortbread Cookie Ingredints
Easy Cookie Icing
Full ingredients, measurements, and instructions are in the recipe card at the bottom of this post.
How to Make Cutout Shortbread Cookies
Step 1: Follow the directions from my shortbread cookie recipe to make the dough.
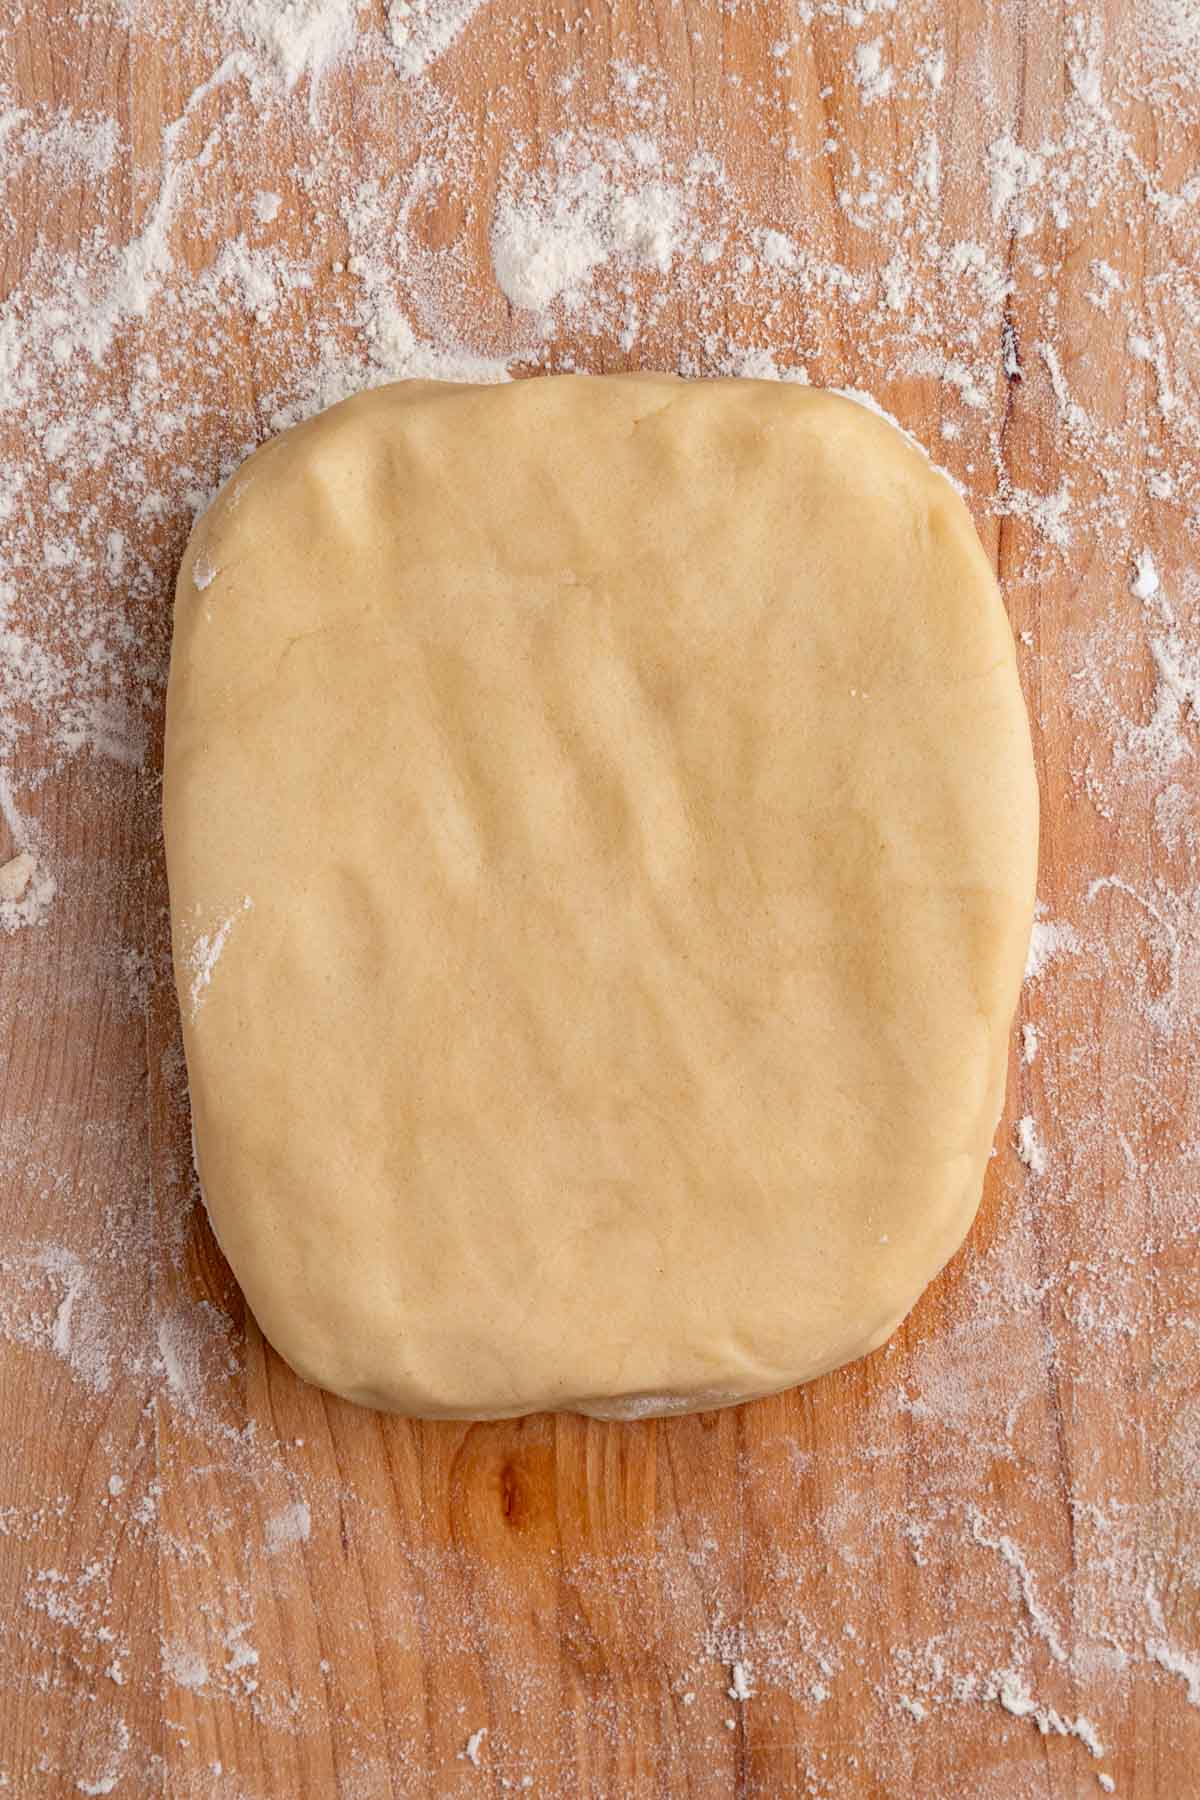
Step 2: Knead the cookie dough and shape it into a rectangle
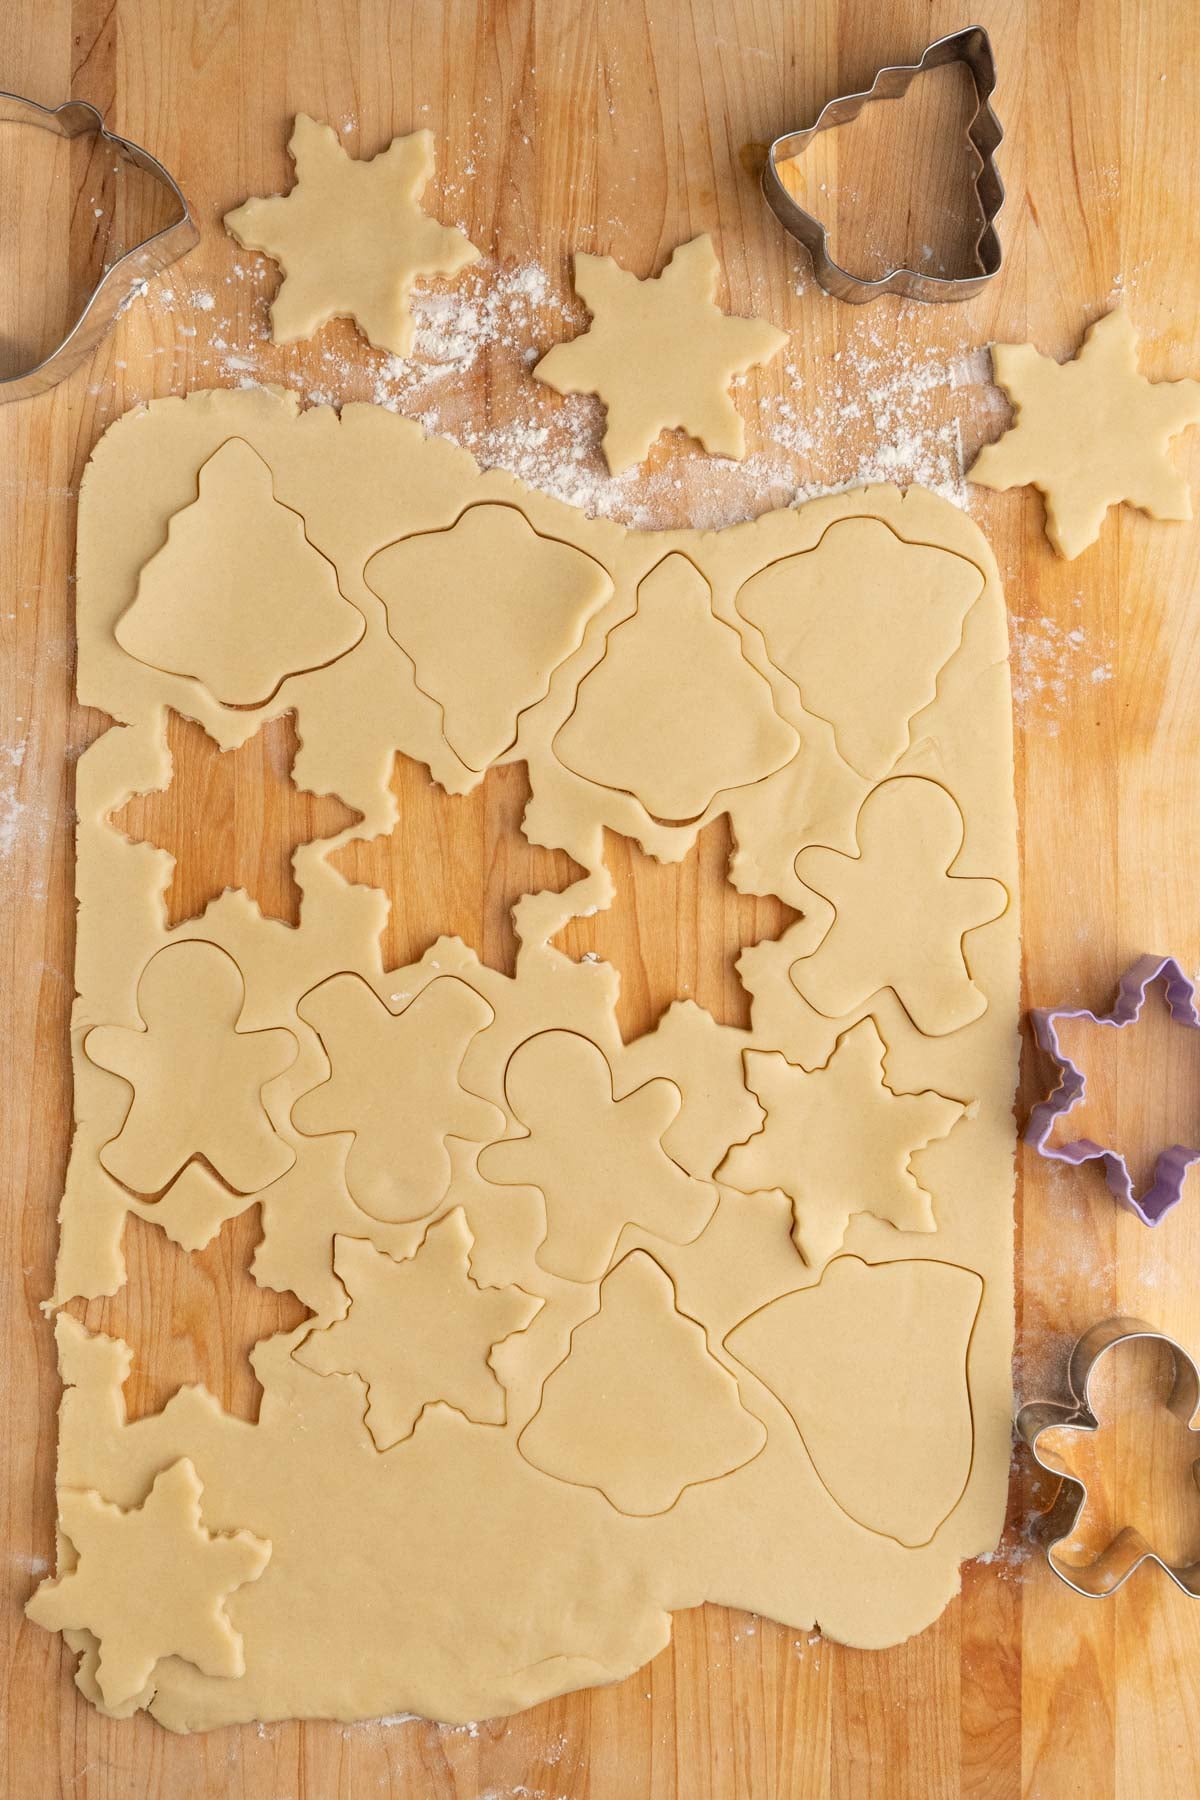
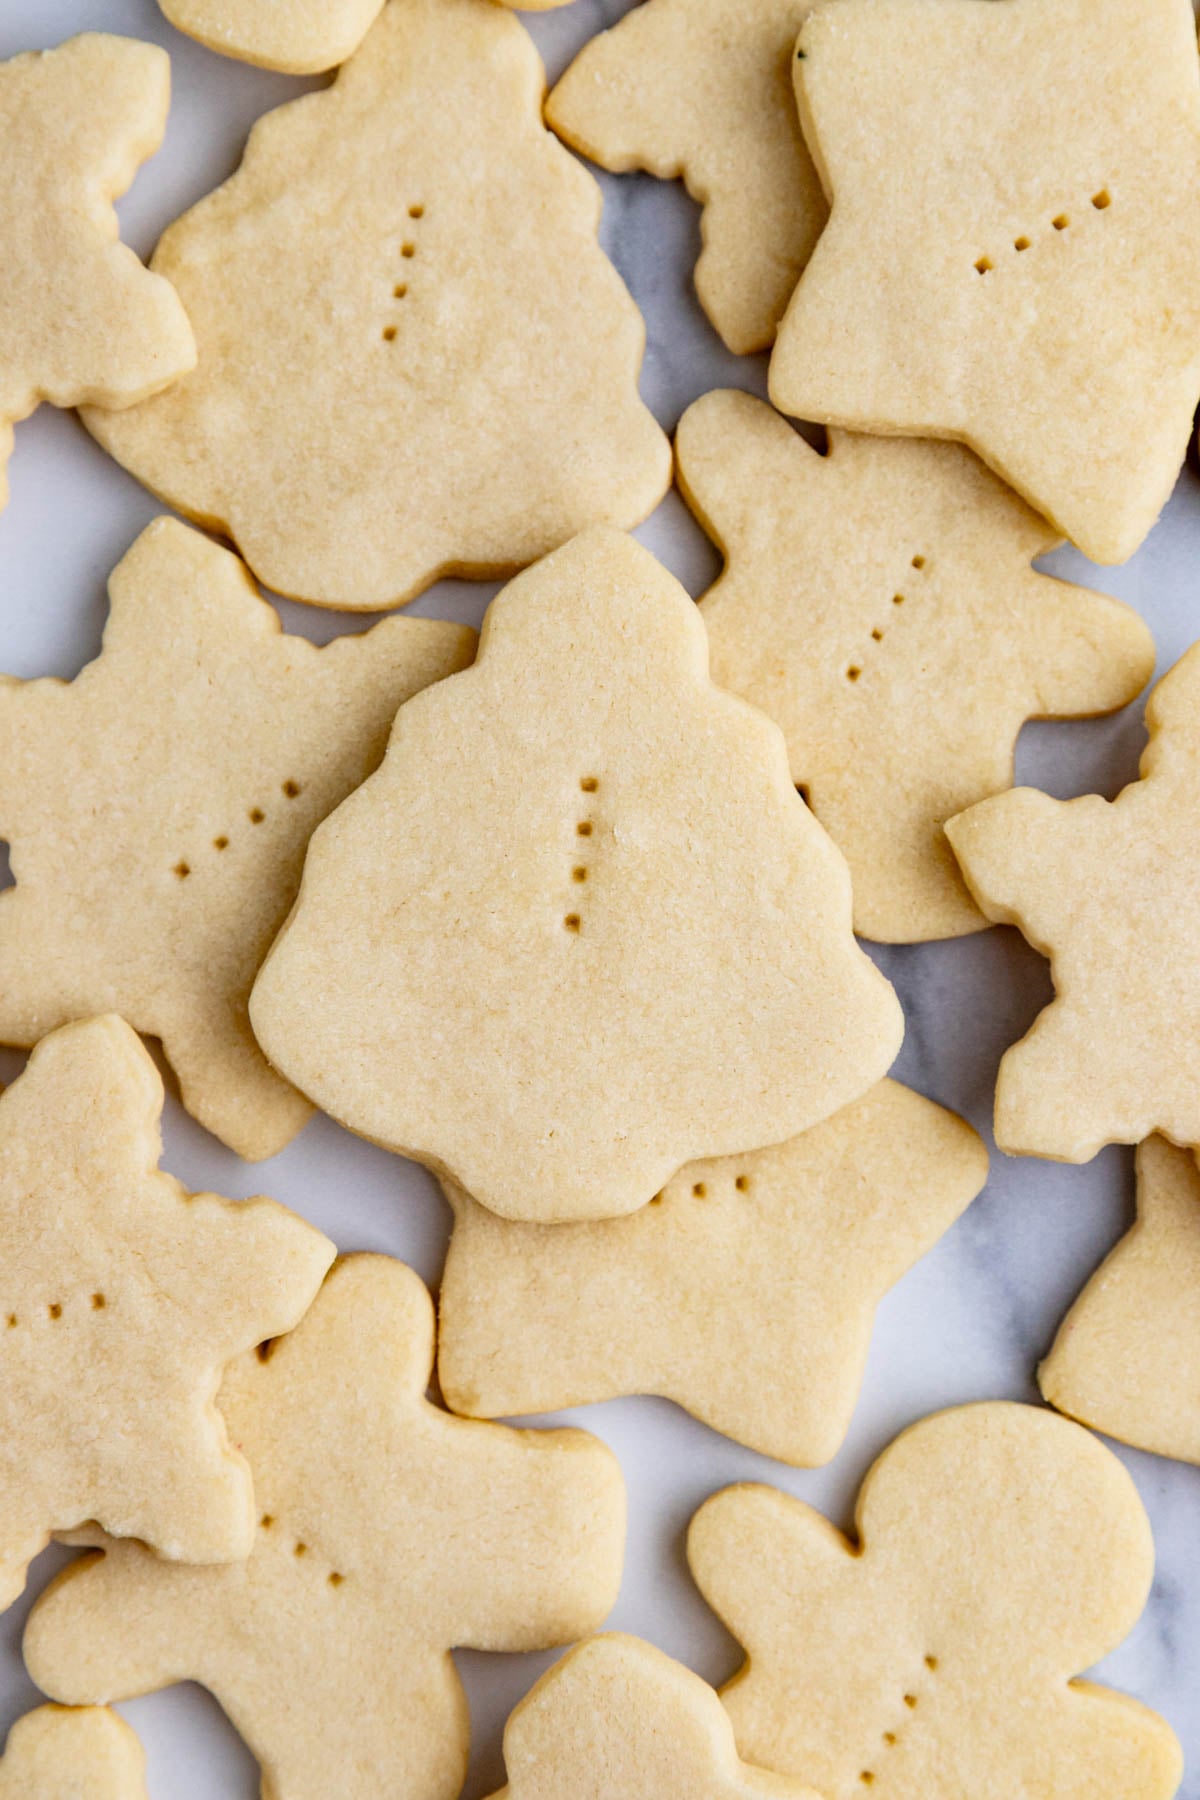
Step 3: Roll the dough out to 1/4-inch thick and cut out the cookie shapes with your favorite cookie cutters.
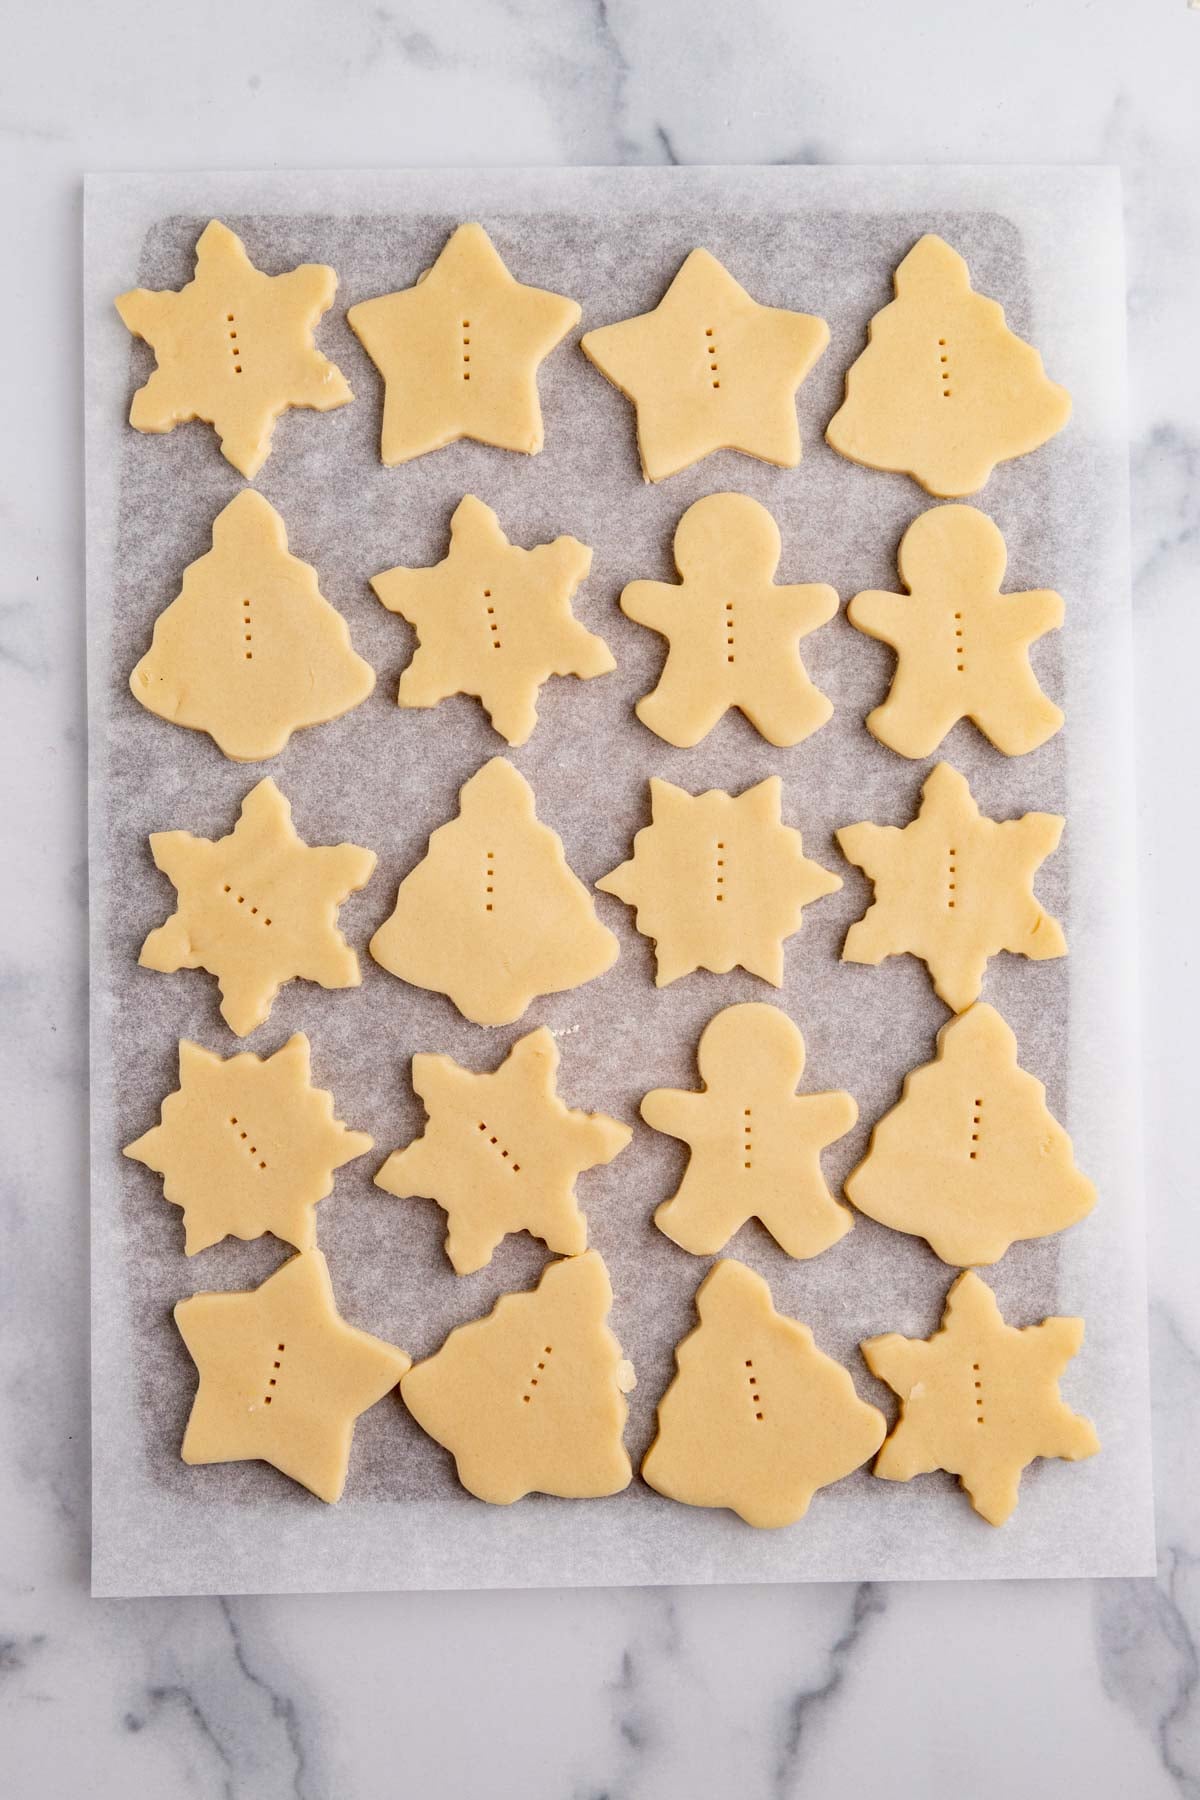
Step 4: Place the cookies on a board or tray and refrigerate them for at least 20 minutes.
Step 5: Place 12 cookies on a parchment lined baking sheet
Step 6: Bake the cookies for 20-22 minutes at 300°F.
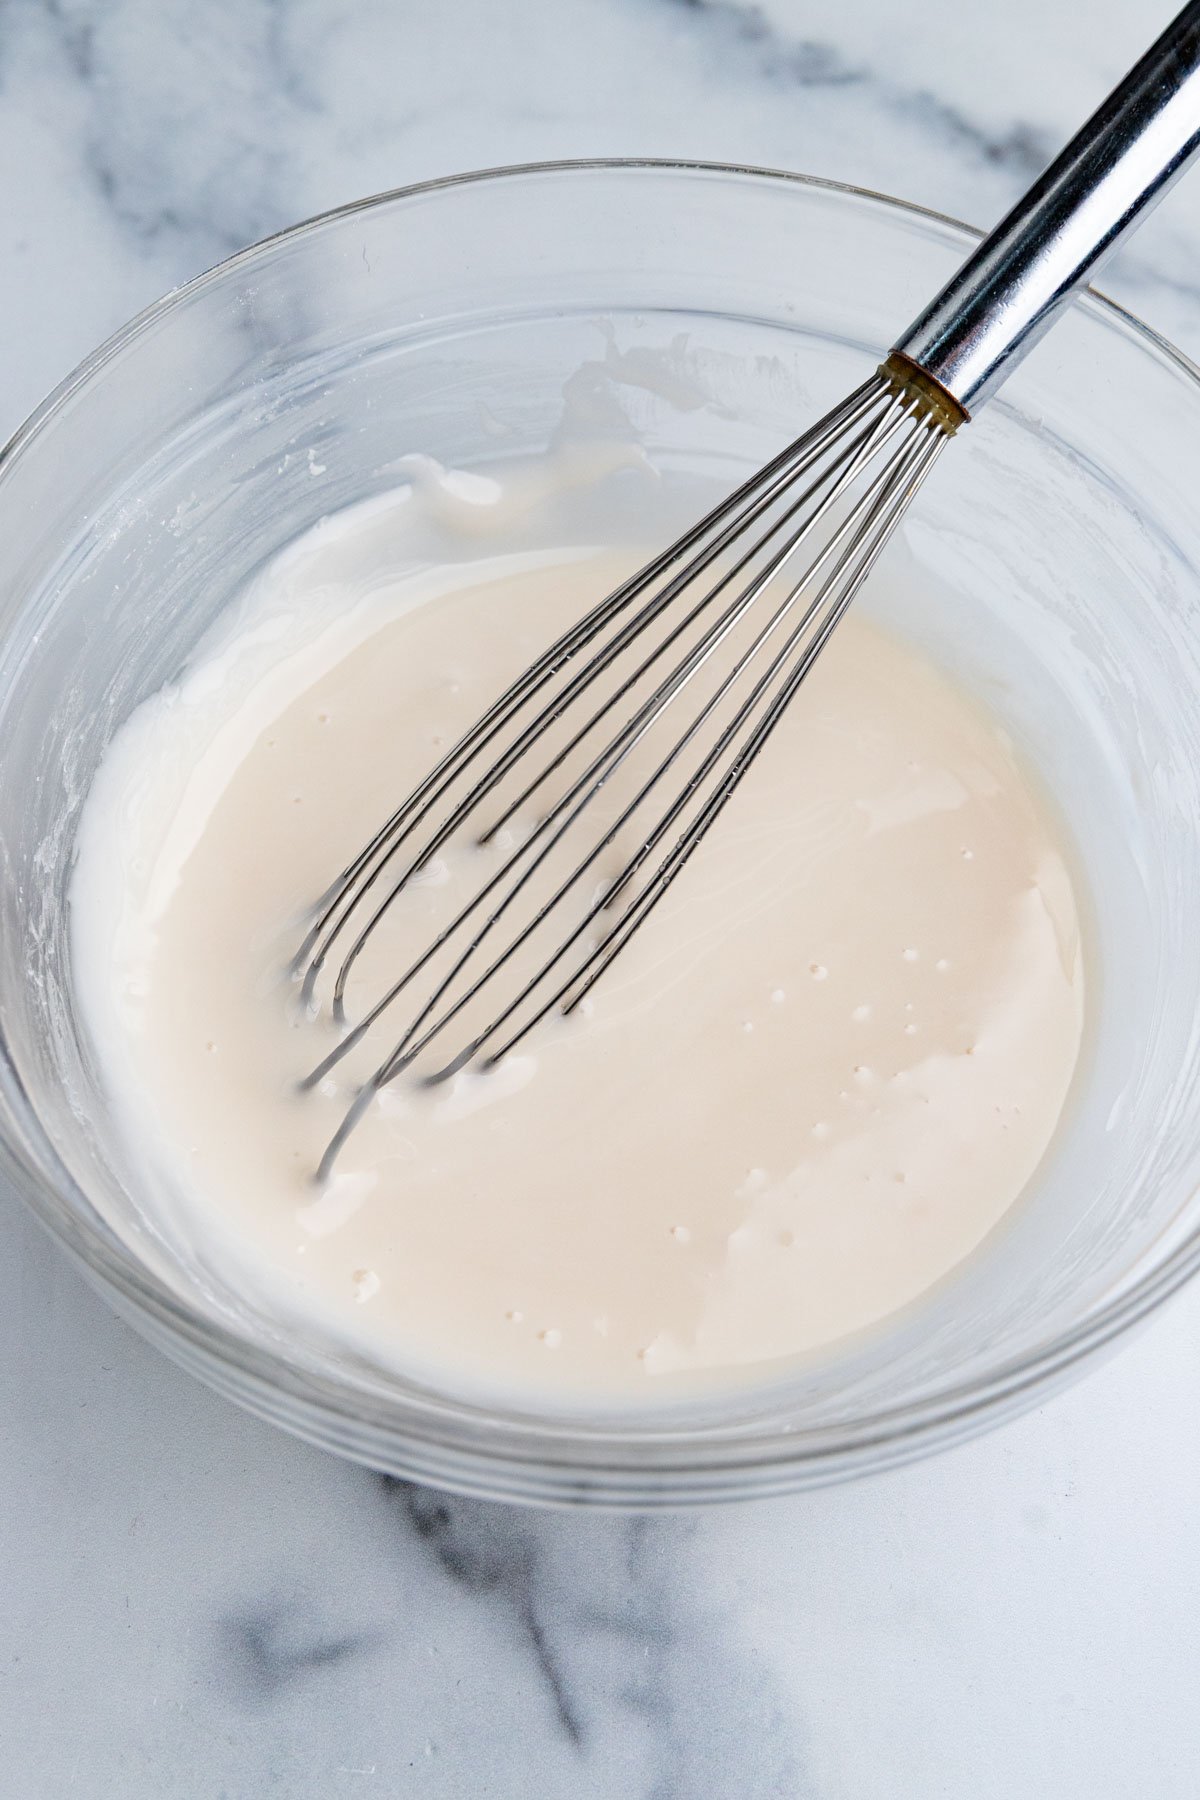
Step 7: Combine the ingredients for the icing and stir together until smooth. Make sure to sift the powdered sugar to ensure a lump free icing.
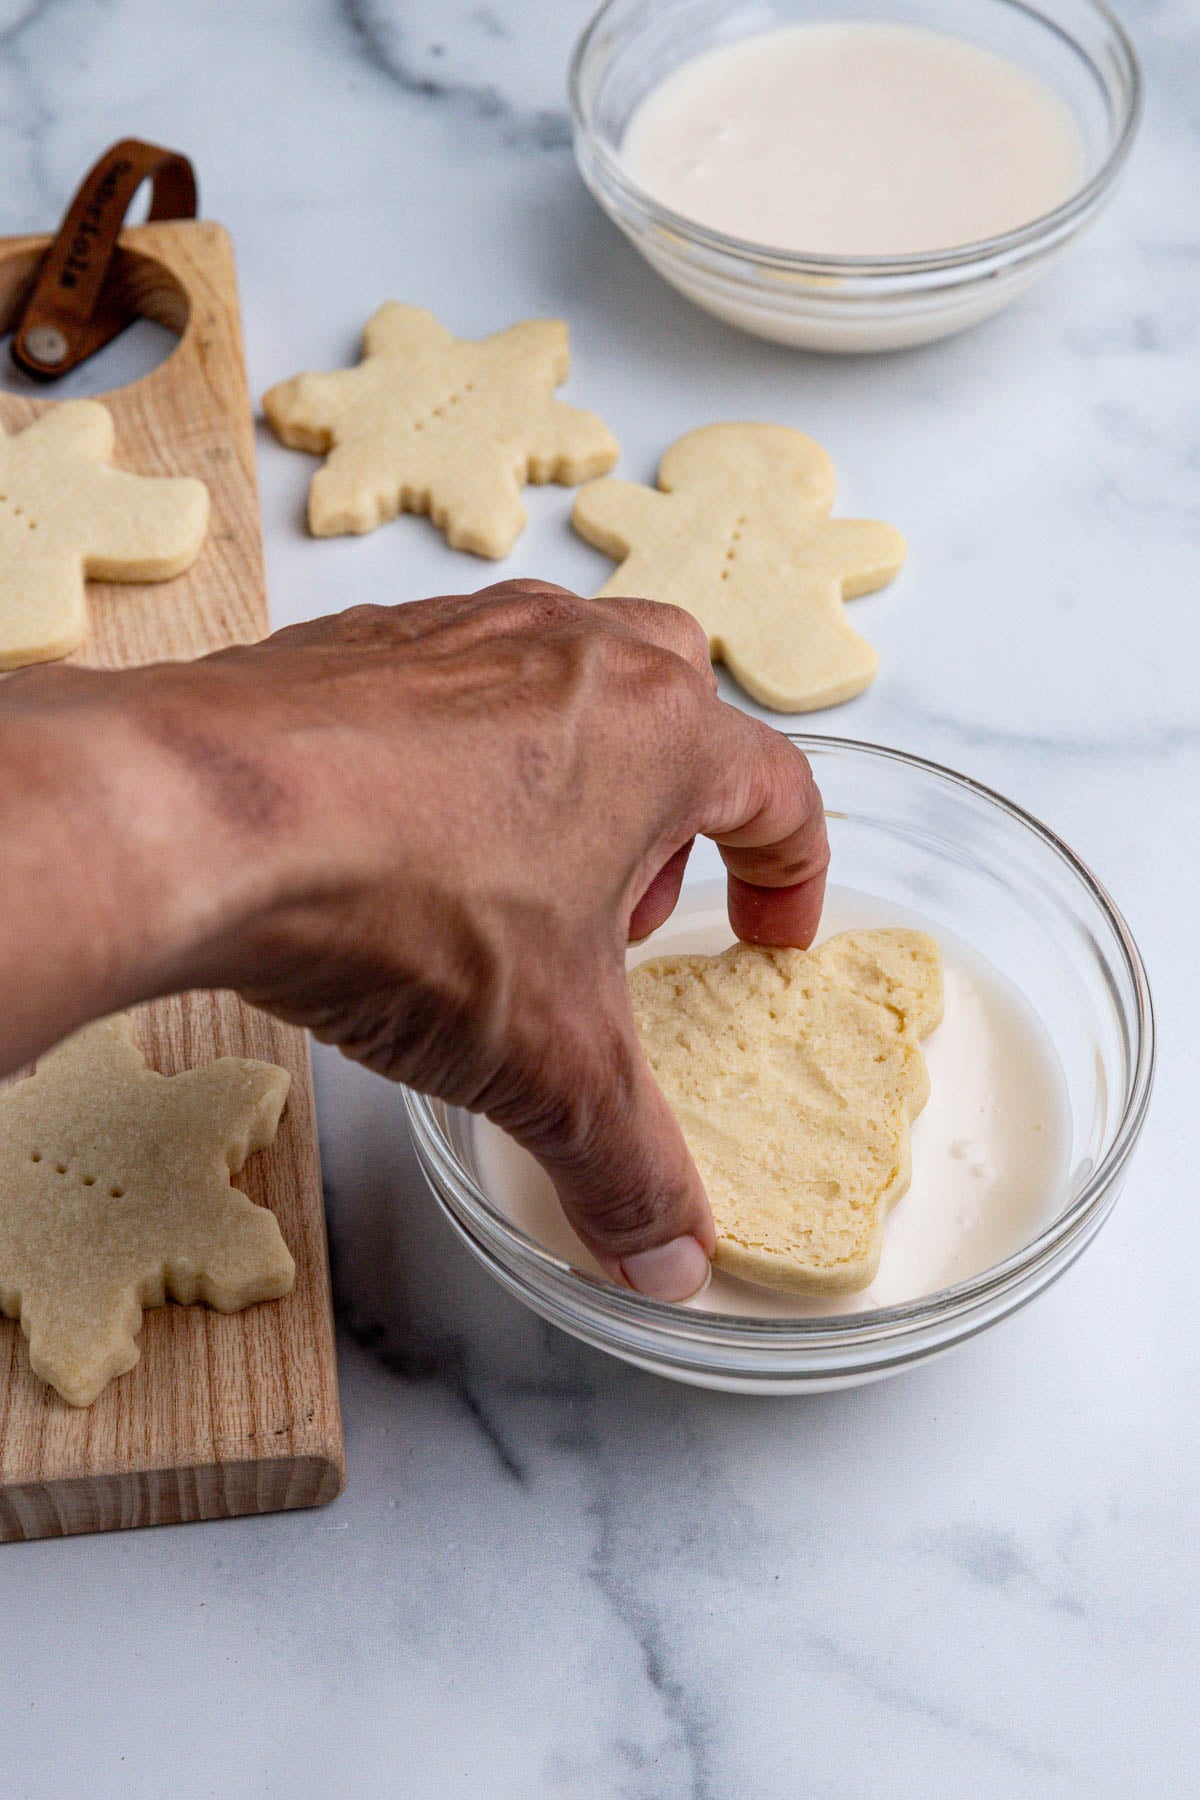
Step 8: Did the top side of the cookie straight down into the icing.
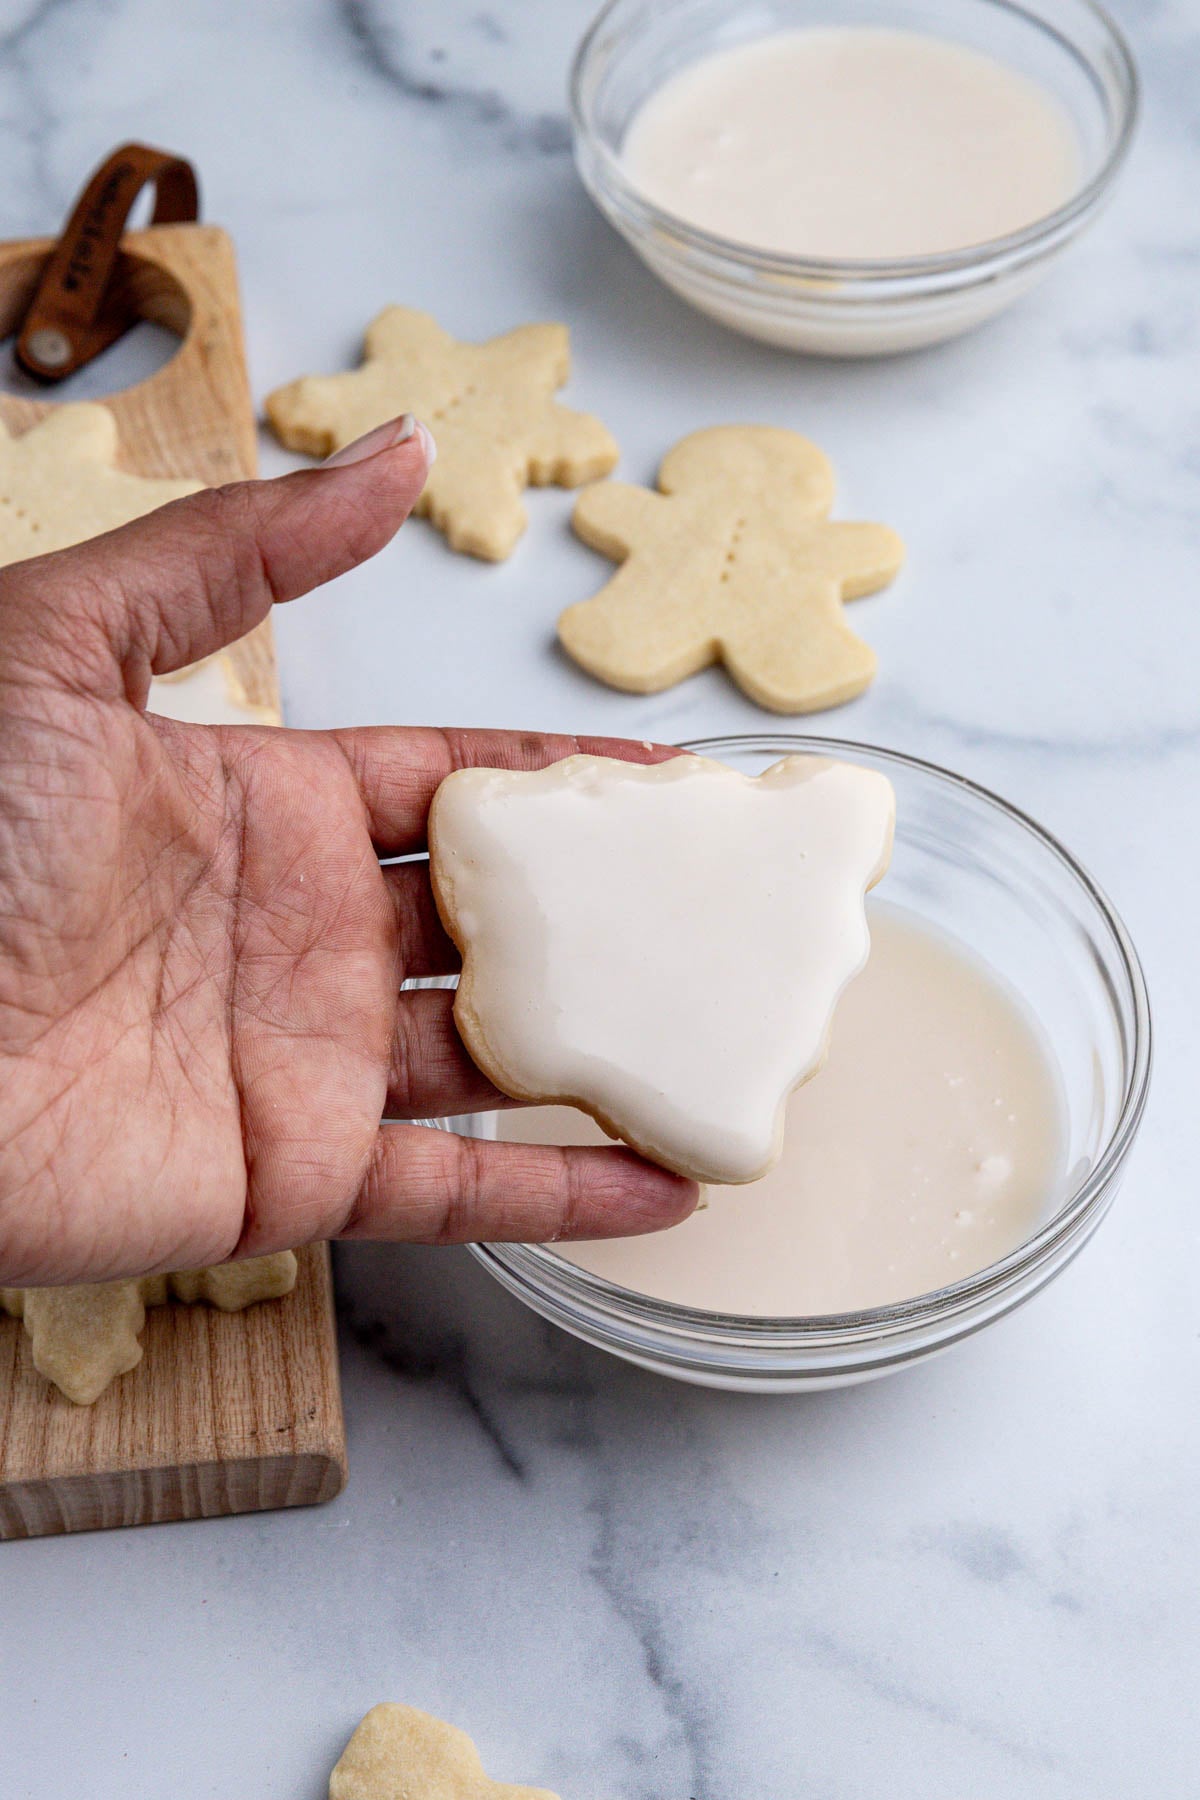
Step 9: Raise the cookie up, shake off the excess icing, and place the cookie on wire rack or board.
Tips for Perfect Cutout Shortbread Cookies at Home
Even though this is a simple recipe, a few small details make a big difference in getting clean edges and a smooth surface:
- Weigh your ingredients. Especially the flour, because the butter and flour ratios are everything in shortbread. Too much flour makes the dough dry and crumbly.
- Let the icing dry fully. Give them at least 12 hours before stacking or packaging. The icing is soft at first but sets beautifully with time.
- Mix just until it comes together. The dough will look crumbly at first but will smooth out after a brief mix at medium speed. Don’t overmix once that happens.
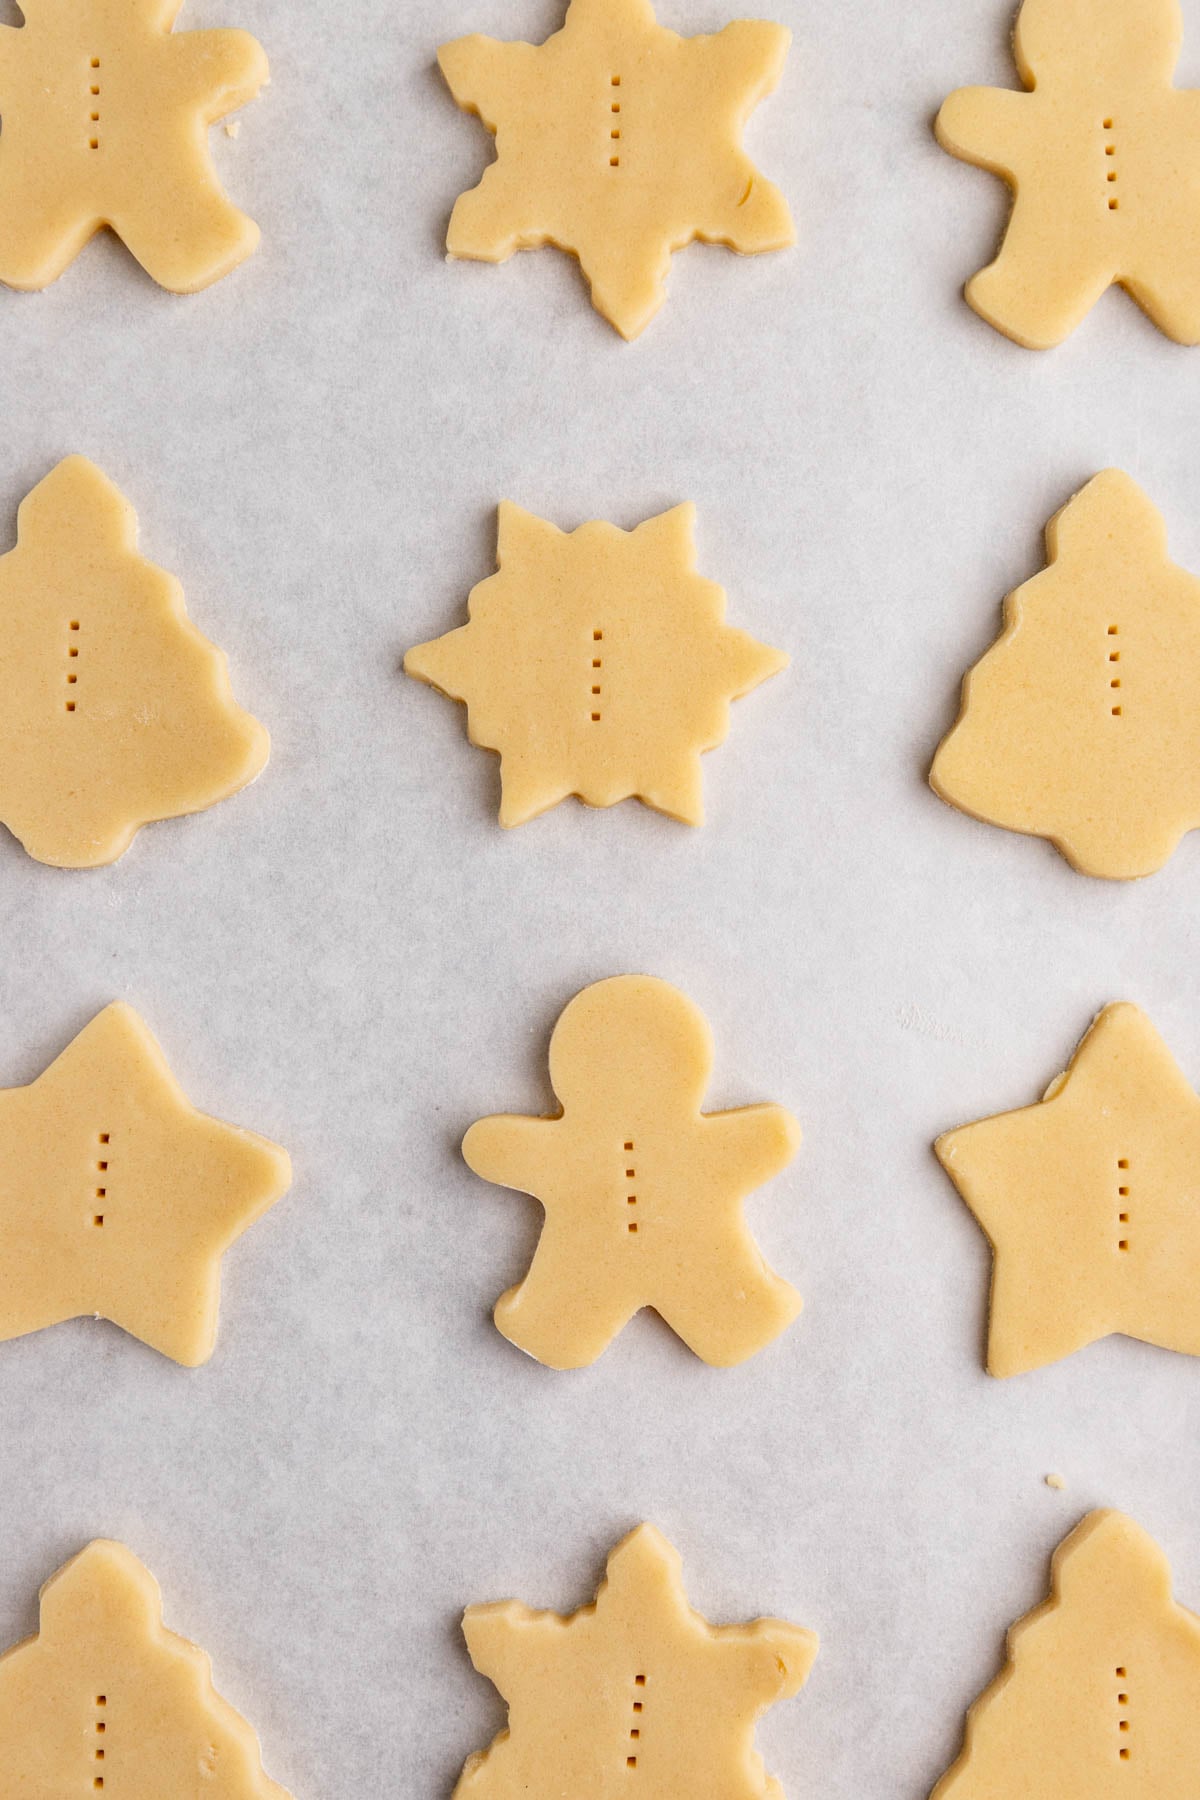
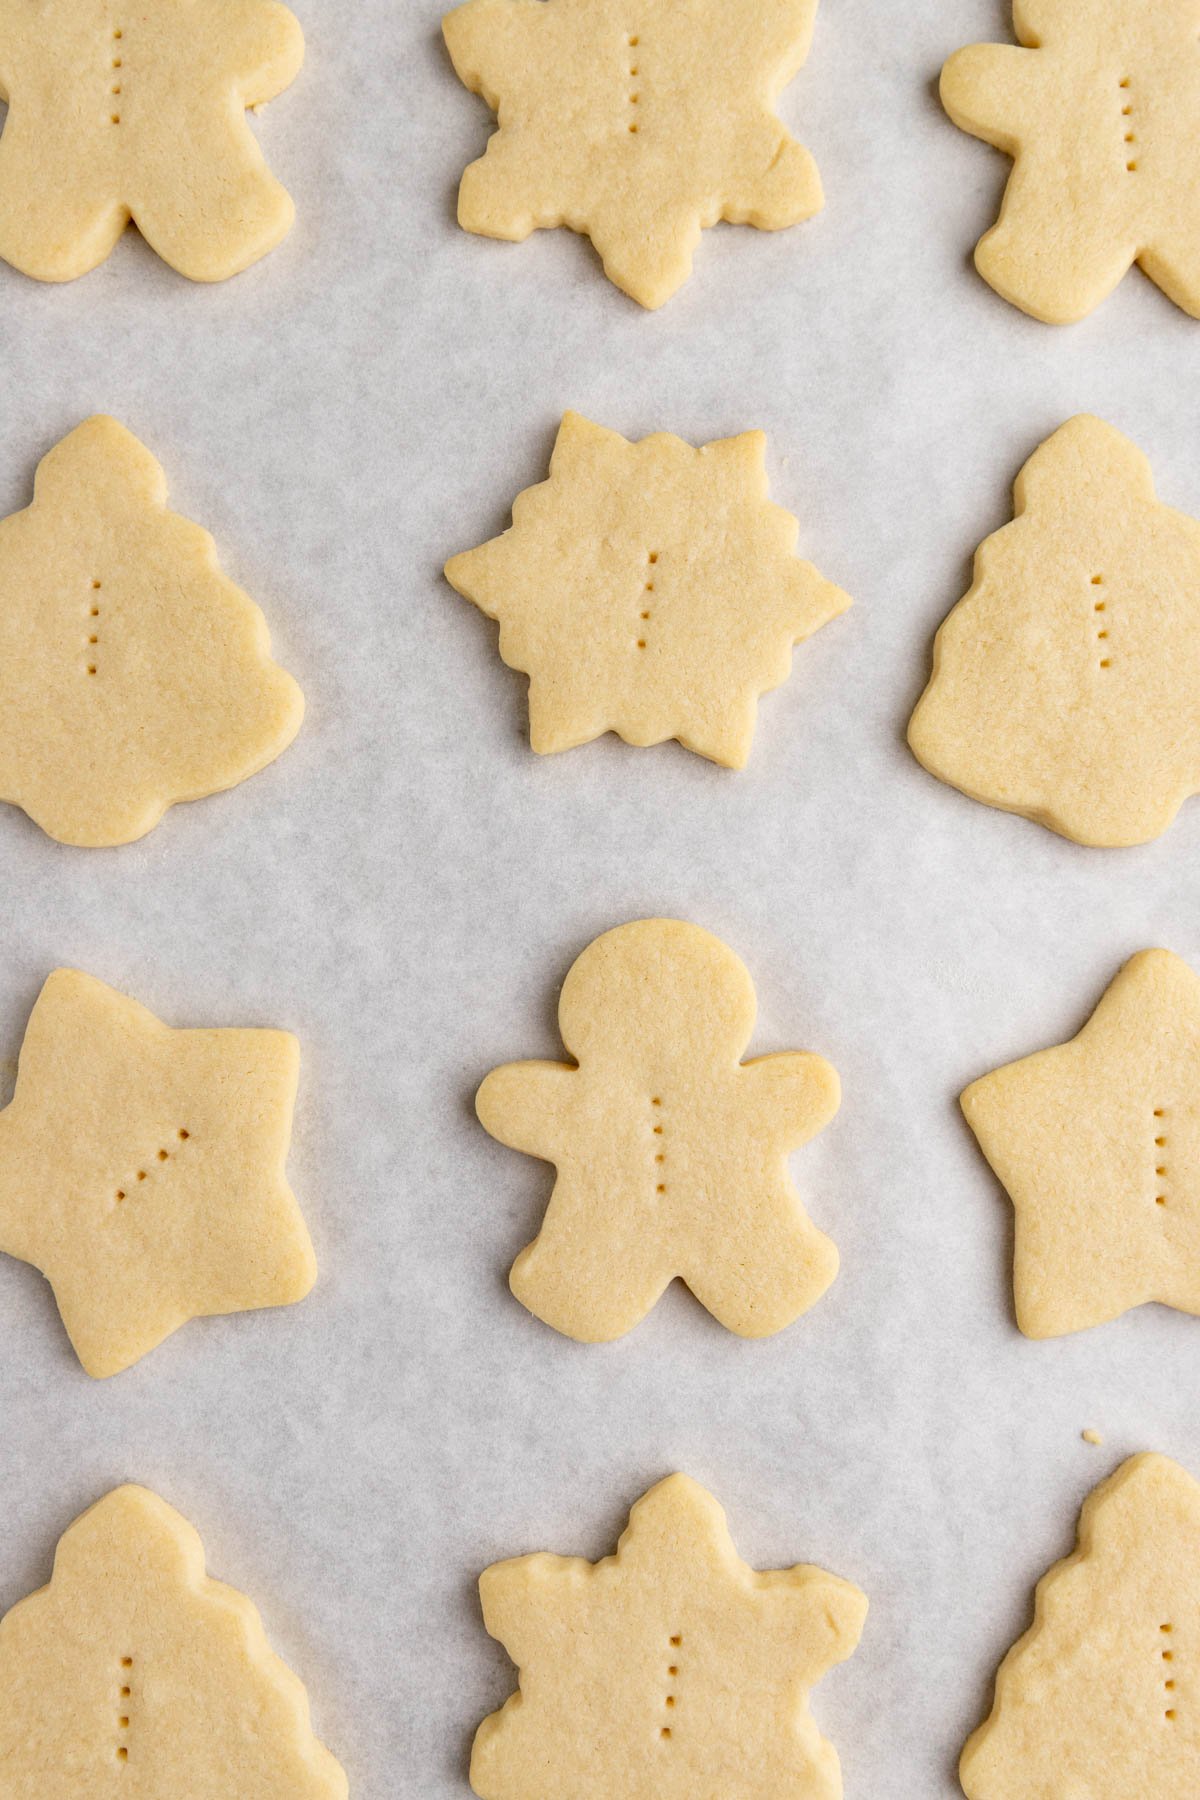
- Don’t skip the fork holes. This prevents bubbling and keeps the surface flat so your icing doesn’t pool or run.
- Chill after cutting. Even a short chill firms up the butter again and helps the cookies bake evenly without spreading.
If you make these yummy shortbread cookies, please leave a rating and a comment below.
Connect with me on Instagram and tag me @bakesbybrownsugar to share your recipe remake photos.
Like what you see? Click here to subscribe to Bake's by Brown Sugar Baking Newsletter to get free and delicious treats delivered to your inbox.
Want to Save This Recipe?
Enter your email below and I'll send it to your inbox. Plus get new and recommended recipes sent to you every week!
By submitting this form, you consent to receive emails from Bakes by Brown Sugar.

Cutout Shortbread Cookies
Equipment
- 3-inch Cookie Cutters
Ingredients
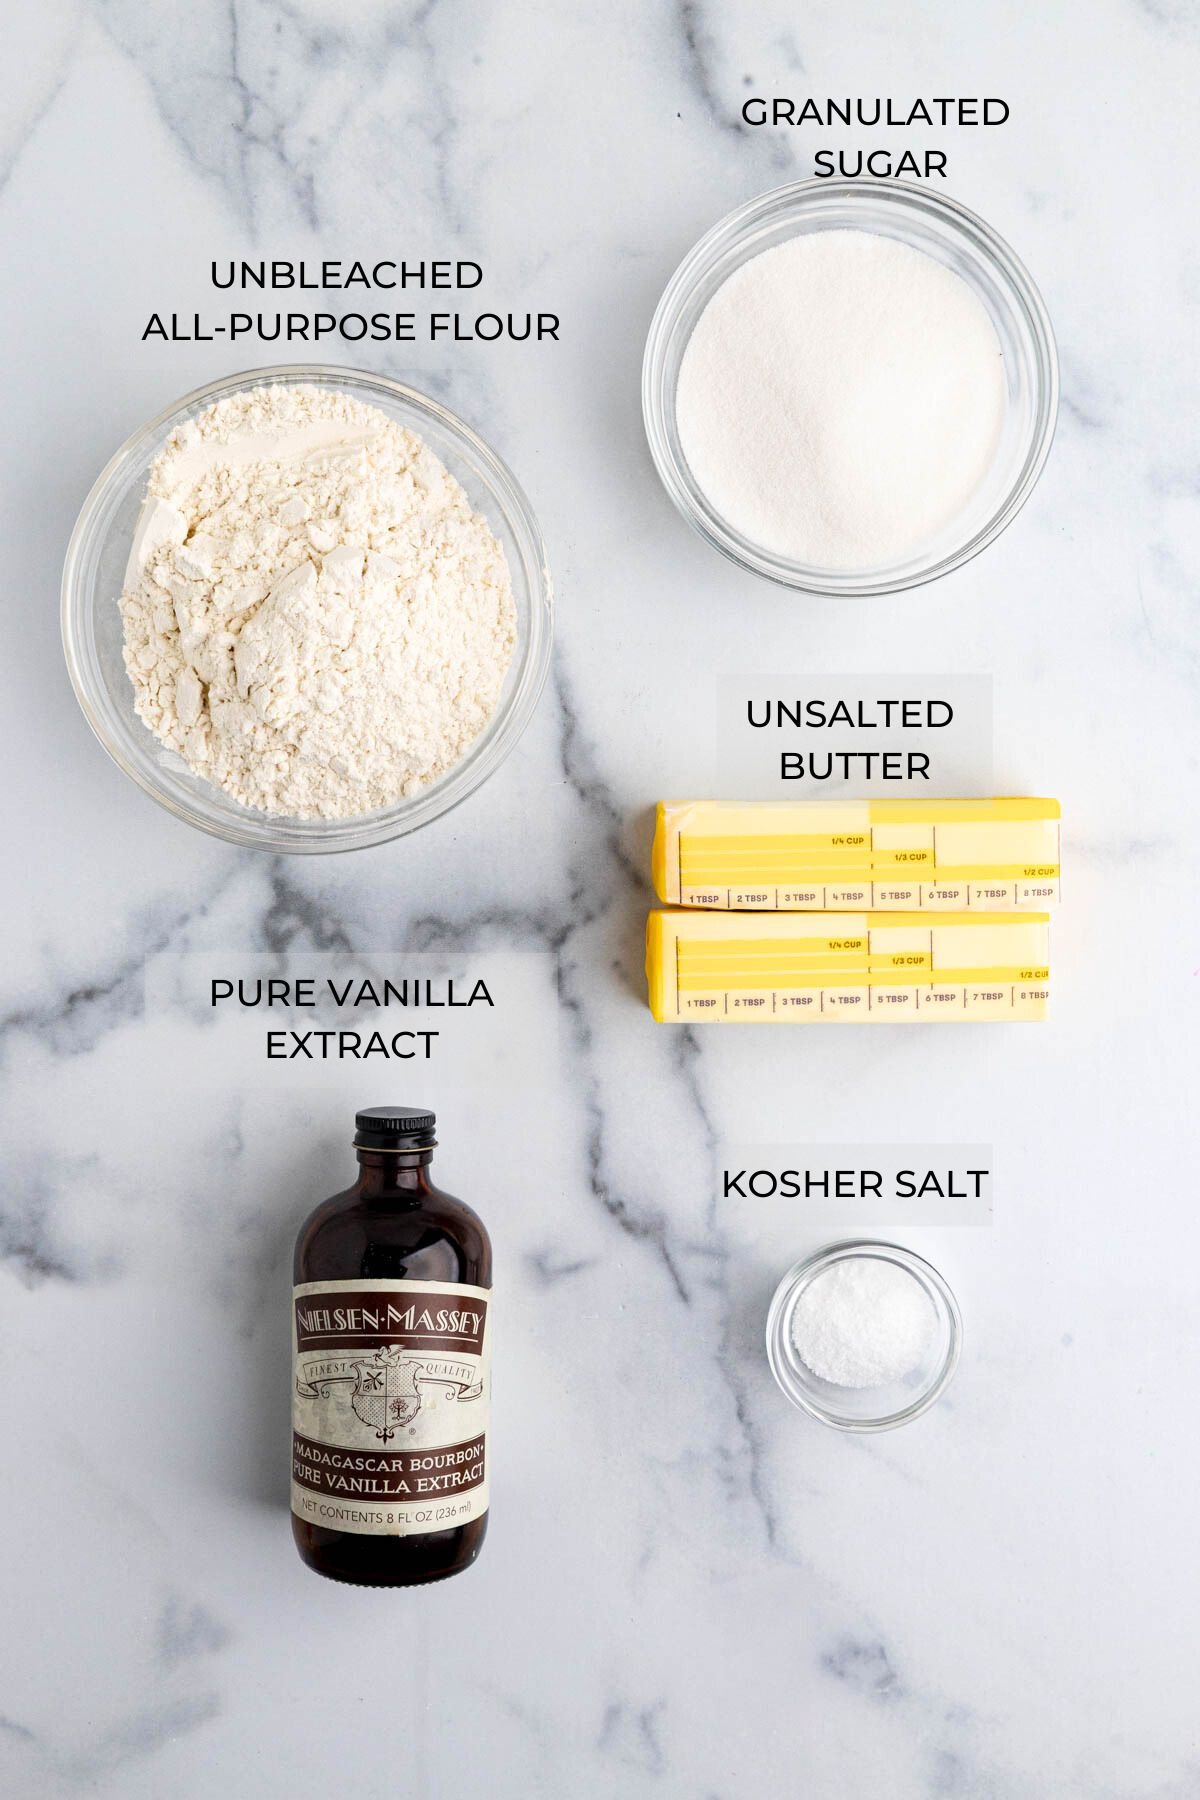
Shortbread Cookie Ingredients
- 4 ounces (114 grams) granulated sugar
- 8 ounces (227 grams) unsalted butter room temperature
- 1 teaspoon pure vanilla extract
- 1/2 teaspoon kosher salt
- 12 ounces (340 grams) unbleached all-purpose flour
Icing Ingredients
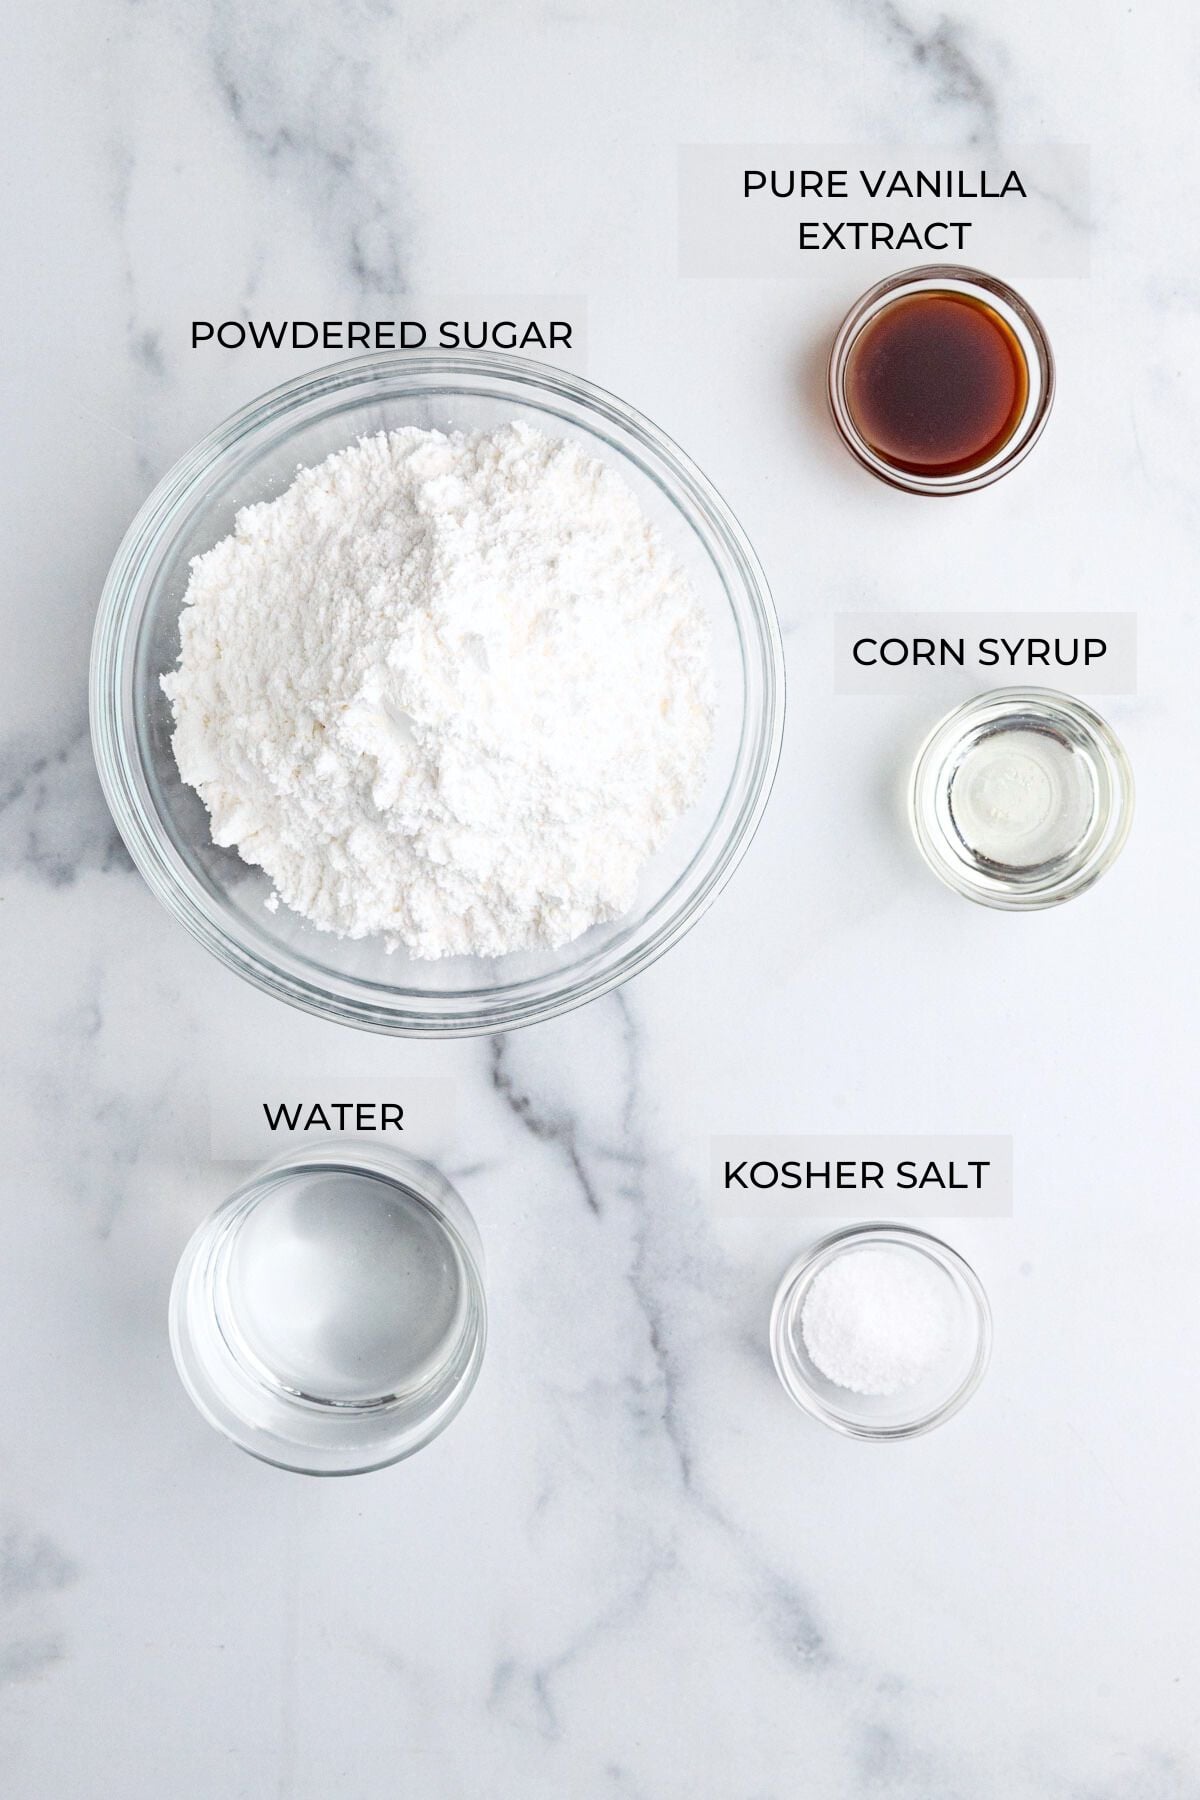
- 3 cups (360 grams) powdered sugar sifted
- 4-6 tablespoons (60-90ml) water or milk
- 1 teaspoon of pure vanilla extract
- 2 teaspoons (14 grams) corn syrup
- 1/8 teaspoon kosher salt
Instructions
Make the Cookie Dough
- Place the sugar, butter, and salt in the bowl of a stand mixer with the paddle attachment and mix on medium speed until the mixture is smooth about 2 minutes.
- Stop the mixer, scrape down the bowl, and add all the flour at once. Turn the mixer to low speed and mix until all the flour is just combined. The dough will be crumbly at this point. Increase the mixer speed to medium and mix until the dough has completely come together.
- Turn the cookie dough out onto a lightly floured surface. You can turn it out onto a large piece of parchment paper or Silpat. Use your hands to shape the dough into a rectangle and lightly flour the top of the dough. Do not use too much flour, just enough to keep the rolling pin from sticking.
- Roll the cookie dough out to 1/4-inch thickness. Use your favorite Christmas cookie cutters to cut out the cookies. Gather the dough scraps, form them into a ball and reroll the cookie dough. Cut out the cookies, repeat these steps until almost all the dough is used up. Use the tines of a fork to poke holes in the center of each cookie.
- Chill the dough for 20 minutes. If chilling overnight cover the cookies with plastic wrap.
Bake the Cookies
- Preheat the oven to 300 degrees F. Place 12 cookies on a parchment lined cookie sheet. Bake for 20-22 minutes. Remove the cookies and allow them to cool for about 5 minutes on the cookie sheet before moving them to a cookie rack to completely cool.
Make the Icing
- Note: If you want a whiter icing, don't use the vanilla extract.
- Place the powdered sugar, corn syrup, vanilla extract, and salt in a medium sized bowl. Add 4 tablespoons of water and stir the ingredients together. The icing should be thick but spreadable. If you want a slightly thinner icing, add additional water 1/2 teaspoon at a time.
Decorate the Cookies
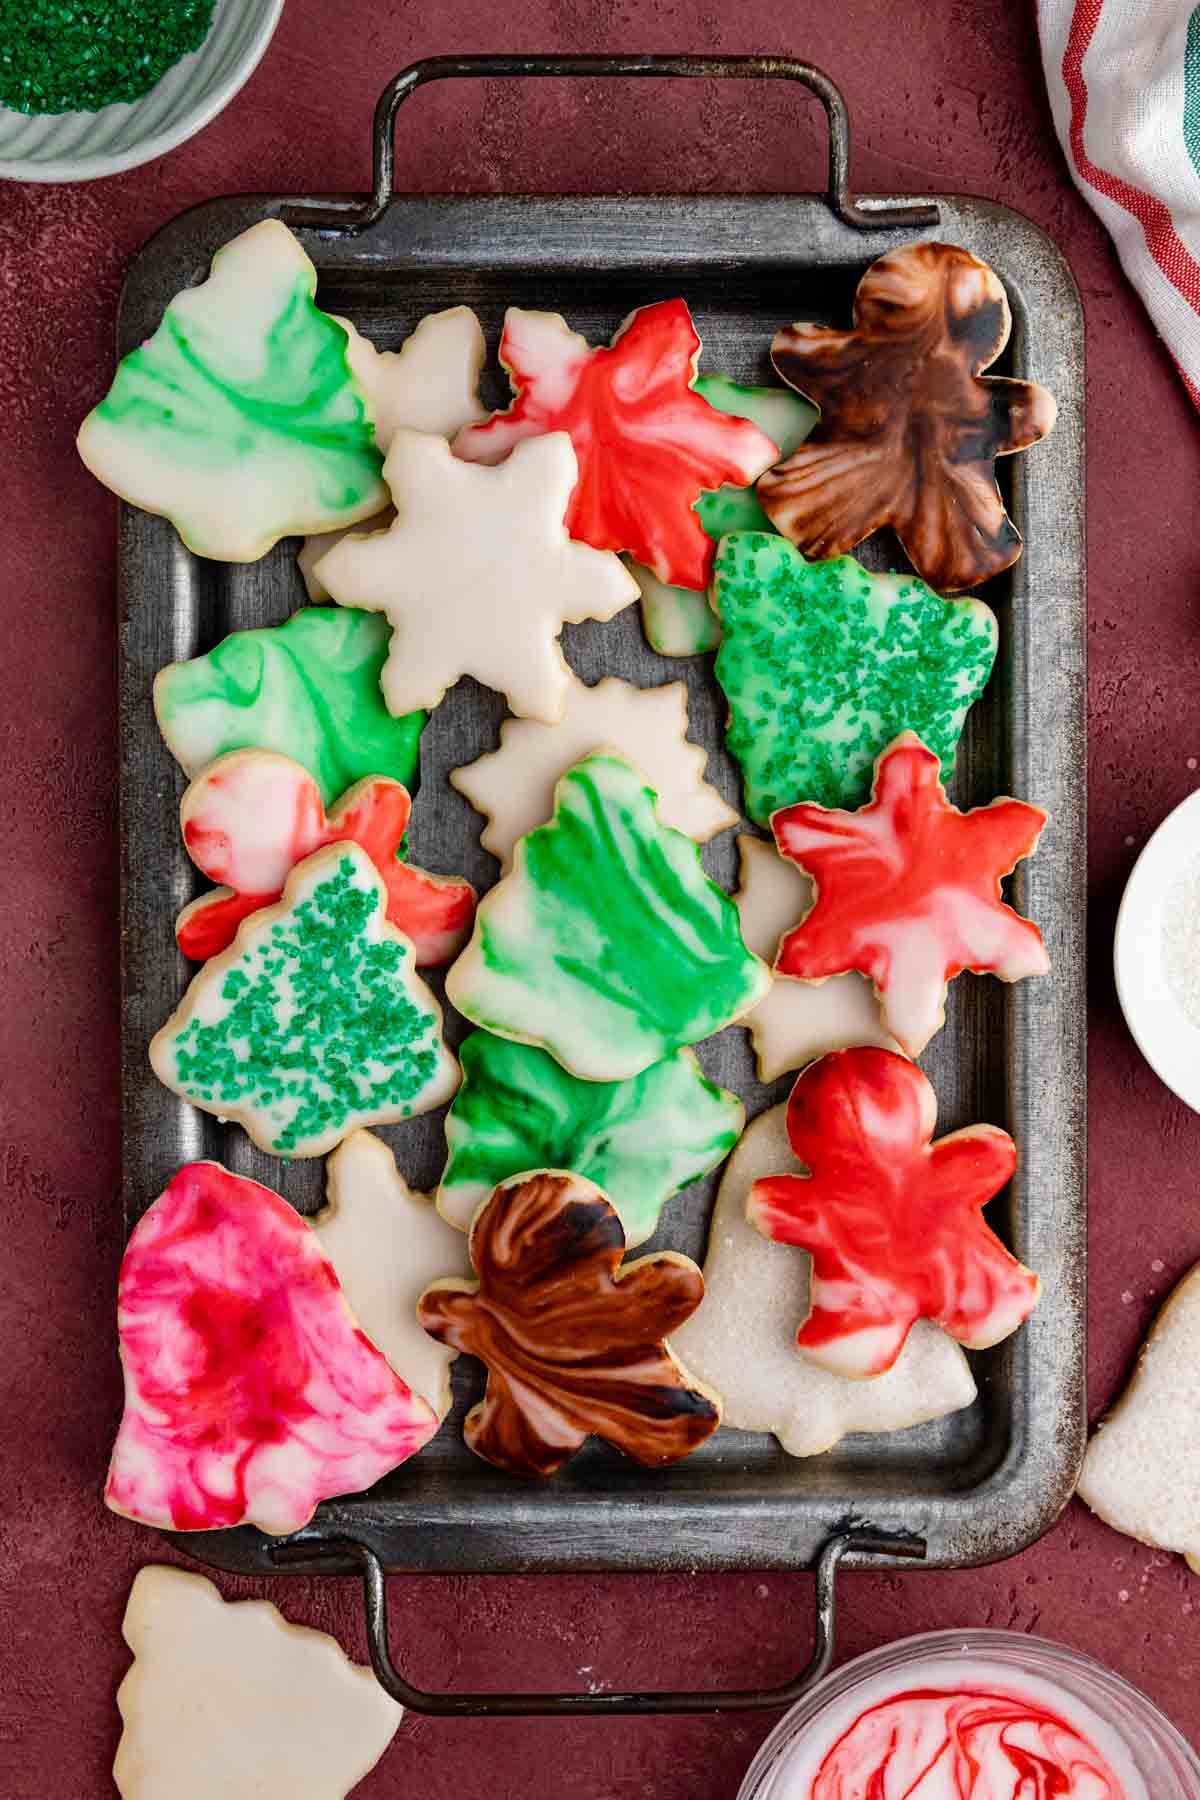
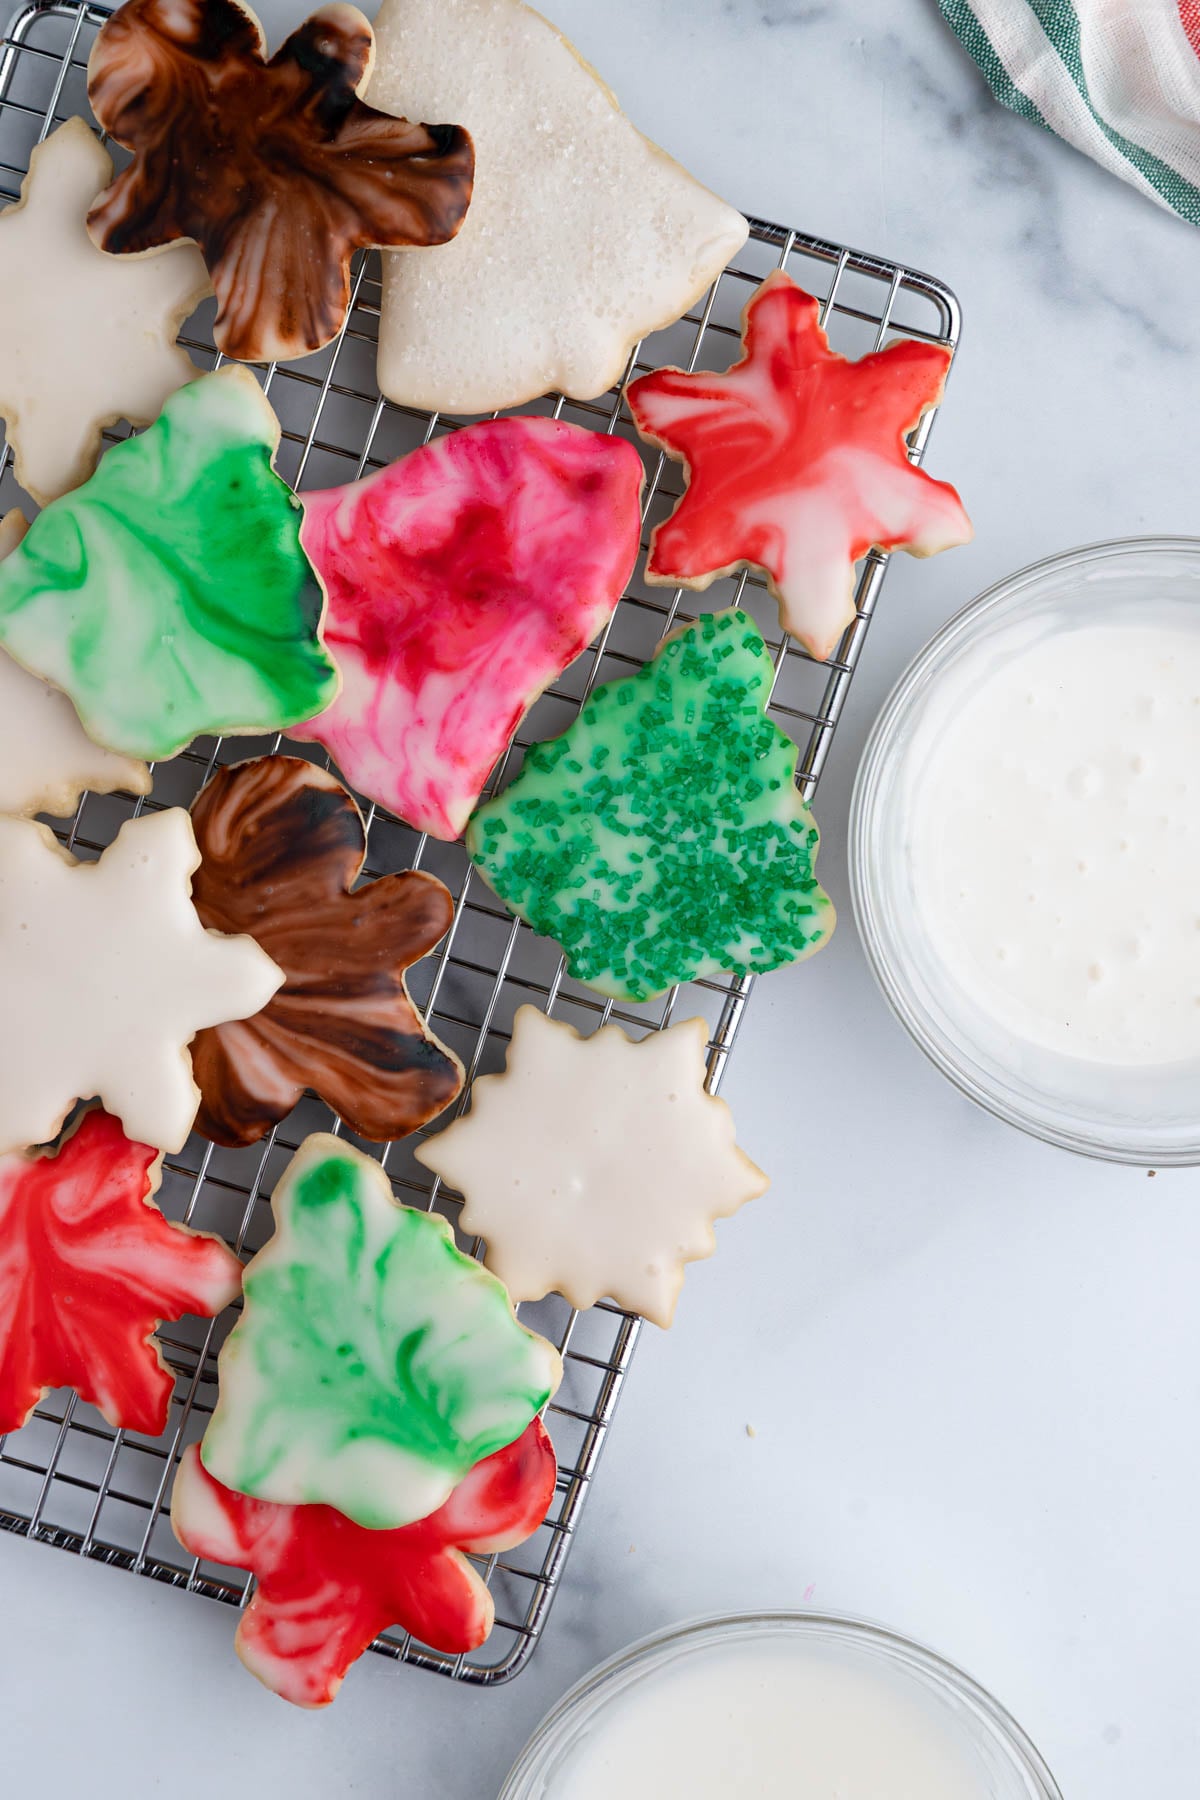
- Method 1: Plain Icing. Dip the top flat side of each cookie (the side with the fork holes) into the icing, gently shake off the excess, and place iced-side up on a wire rack. Allow the icing to dry for at least 12 hours until completely hard.
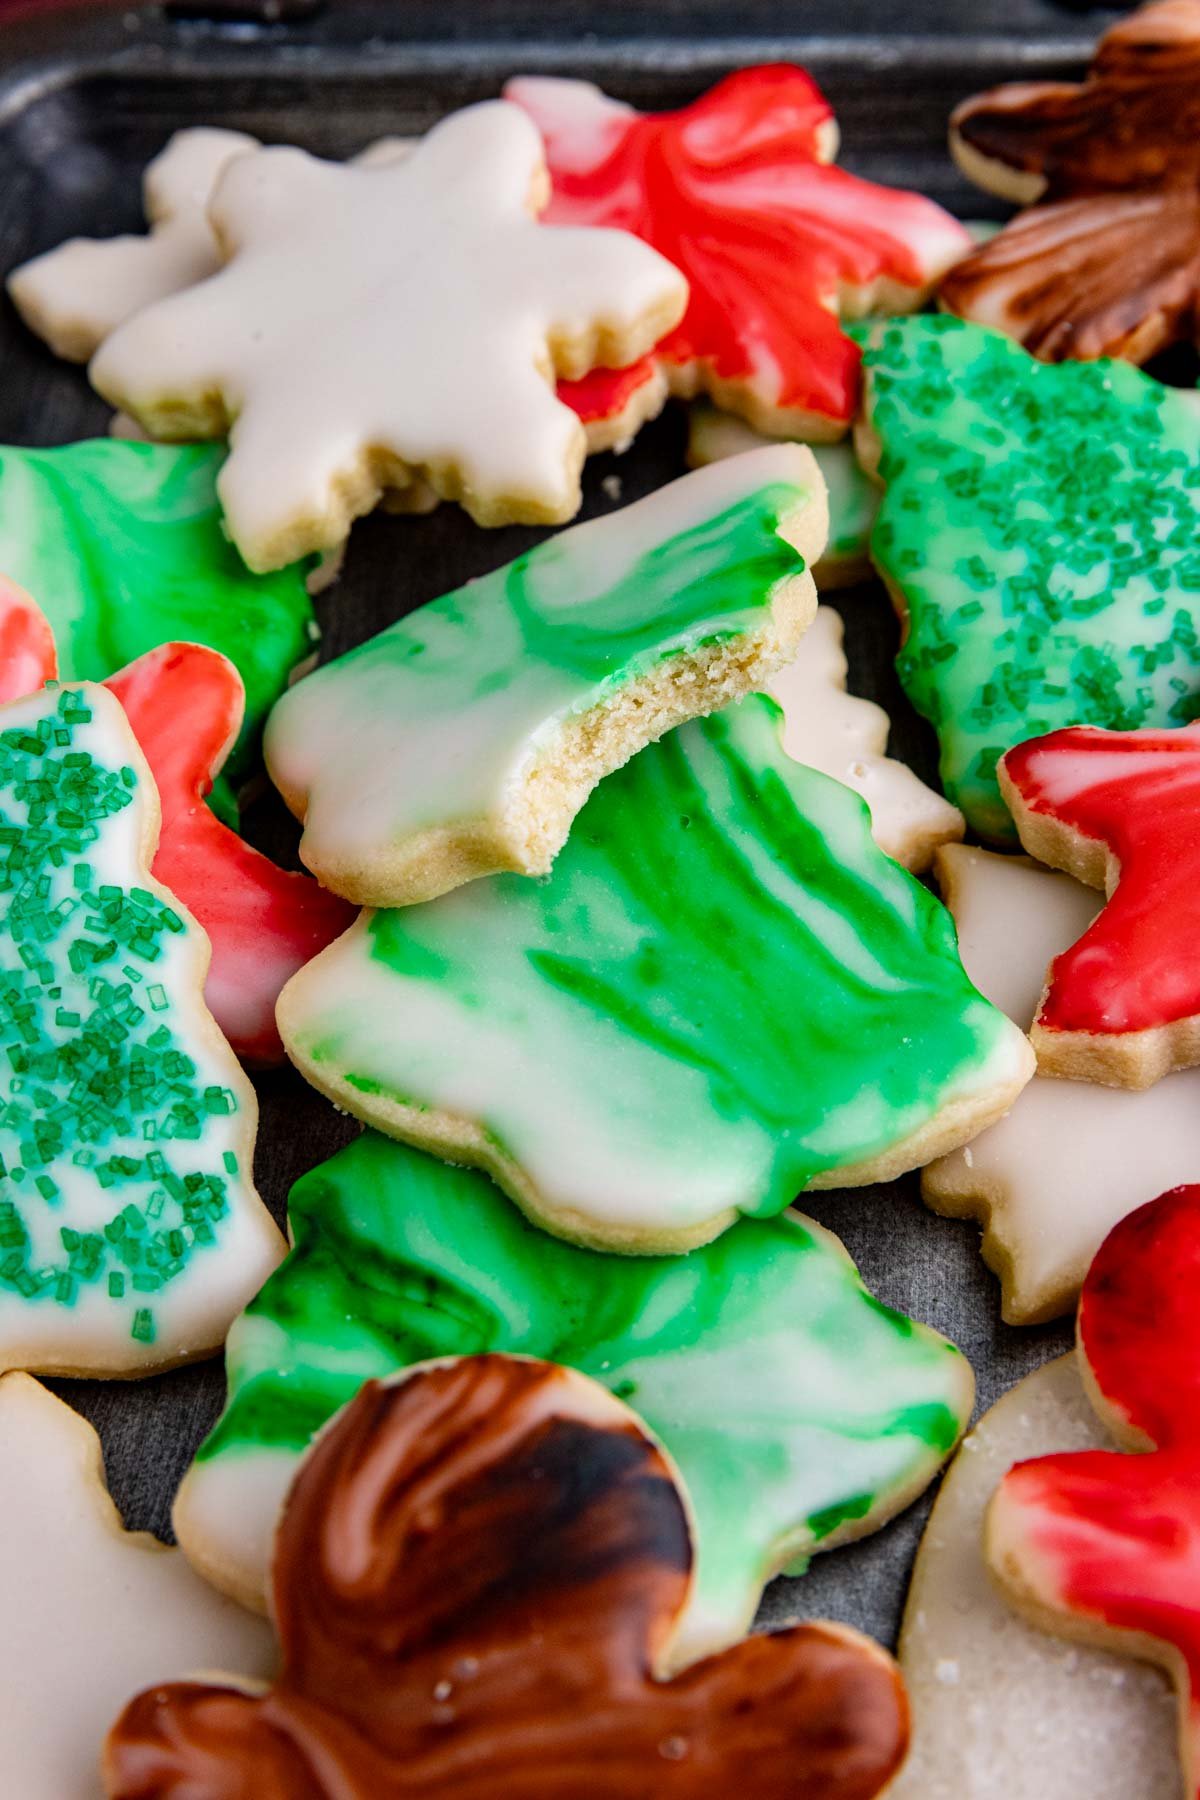
- Method 2: Swirled Icing. Place a drop of gel food coloring into your prepared icing. Use a skewer or toothpick to gently swirl the color through the icing—don't mix it completely, you want to see distinct swirl patterns. Dip the top flat side of each cookie (the side with the fork holes) into the icing, lift it up, shake off the excess, and place iced-side up on a wire rack. The swirled pattern will be visible on the cookie surface. Allow to dry for at least 12 hours.
- Optional: Decorating Sugar. For either method, you can sprinkle decorating sugar over the wet icing immediately after dipping, before the icing begins to set.
Storage
- The cookies can be stored for up to 2 weeks in an airtight container.
Thanks for visiting my blog. Let me know what you think.